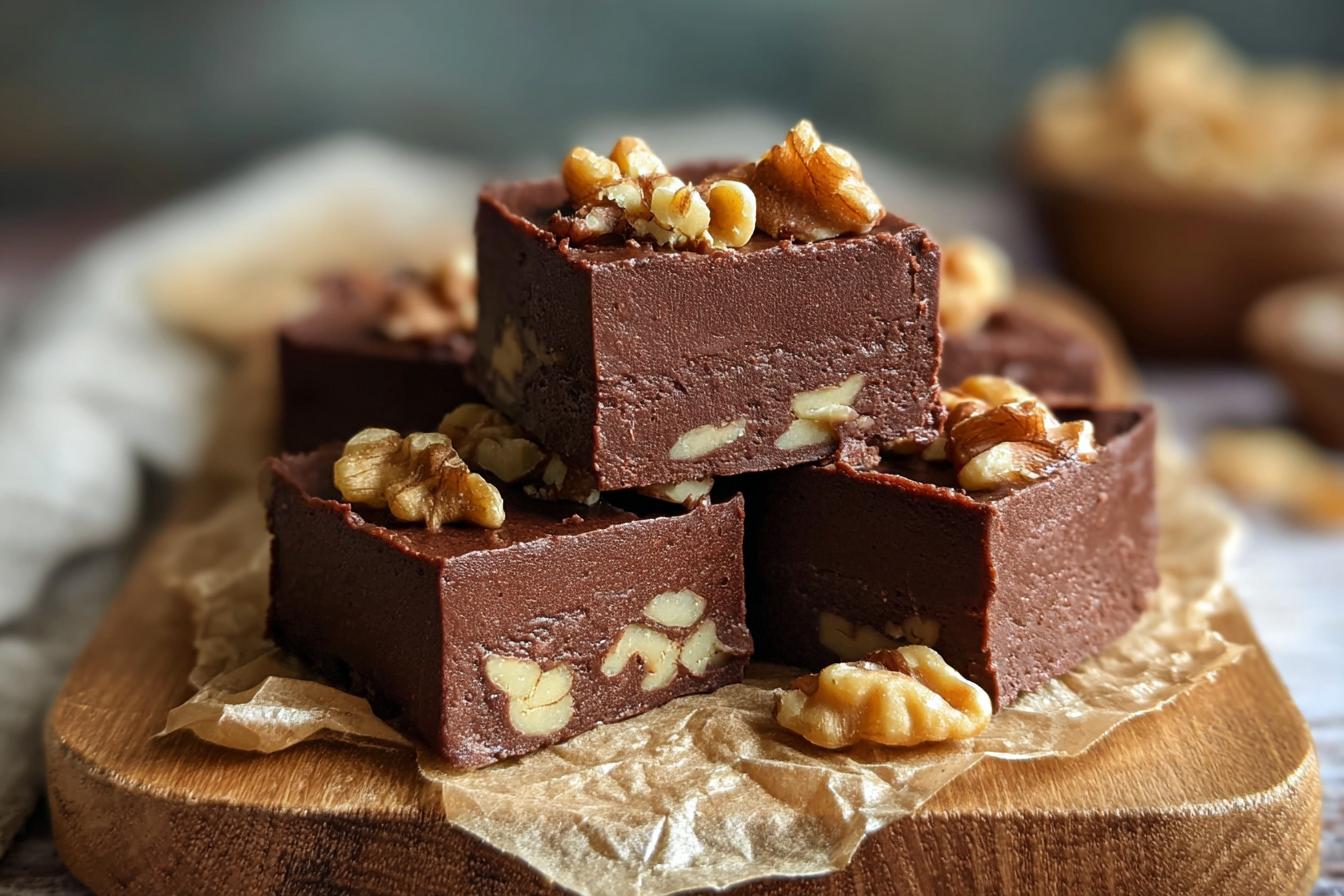
You know those days when you’re craving something rich and chocolatey, but turning on the oven feels like too much effort? That’s when these no bake chocolate bars swoop in to save the day! I’ve been making this recipe for years—it’s my go-to when friends drop by unexpectedly or when I need a quick dessert fix. The fudgy texture melts in your mouth, and the walnuts add that perfect little crunch. Best part? You only need 15 minutes of hands-on time. Trust me, once you try these, you’ll keep the ingredients stocked just like I do!
Why You’ll Love These No Bake Chocolate Bars
Oh, where do I even start? These bars are pure magic—here’s why:
- No oven, no problem: Perfect for hot days or when you just can’t be bothered to preheat. (Hello, lazy dessert wins!)
- Rich, fudgy goodness: That melt-in-your-mouth texture? It’s like biting into a chocolate cloud with a nutty crunch.
- Ready in a flash: From mixing bowl to fridge in 15 minutes—ideal for last-minute cravings or surprise guests.
- Walnut wonder: The toasted bits add this irresistible earthy depth that makes you go, “Wow, I made this?!”
Seriously, they’re the easiest no-bake brownies you’ll ever whip up. And yes, they taste even better than they look.
Ingredients for No Bake Chocolate Bars
Okay, let’s talk ingredients—this is where the magic starts! I’ve made these bars so many times I could probably recite this list in my sleep. Here’s what you’ll need:
- 2 cups semisweet chocolate chips: The star of the show! I like Ghirardelli or Guittard for that deep chocolate flavor.
- 1/2 cup unsalted butter: Leave it out for 30 minutes to soften—it’ll melt smoother.
- 1/2 cup sweetened condensed milk: That sticky-sweet goodness binds everything together.
- 1 teaspoon vanilla extract: Splurge on the real stuff—it makes a difference.
- 1/4 teaspoon salt: Trust me, this tiny bit makes the chocolate sing.
- 1/3 cup unsweetened cocoa powder: Dutch-processed gives the richest flavor.
- 1 cup chocolate cookie crumbs: Oreos work great—just scrape out the filling!
- 3/4 cup chopped walnuts: Toast them first for extra crunch.
- 12 walnut halves: For that pretty finishing touch.
See? Nothing fancy—just pantry staples that come together in the most delicious way!
Equipment You’ll Need
- 8-inch square pan: My trusty old one has seen more chocolate than I can count.
- Parchment paper: Lifesaver for easy removal—no stuck-on bits!
- Medium saucepan: Nothing fancy, just something sturdy for melting.
- Spatula: For scraping every last bit of that glorious chocolate mixture.
That’s it—no special gadgets required. Just grab these basics and you’re golden!
How to Make No Bake Chocolate Bars
Alright, let’s get to the fun part—making these dreamy chocolate bars! Don’t worry, it’s so easy you’ll be tempted to make a double batch (I always do). Just follow these simple steps, and in no time, you’ll have a tray of fudgy goodness chilling in your fridge.
Step 1: Prep the Pan
First things first—grab that 8-inch square pan and line it with parchment paper. Leave some overhang on the sides so you can lift the whole slab out later. No sticking, no mess!
Step 2: Melt the Base
Now, the magic begins! Toss your chocolate chips, butter, and sweetened condensed milk into a saucepan over low heat. And I mean low—we’re not rushing this. Stir constantly until everything melts into a silky, glossy pool of chocolatey heaven. This takes about 5 minutes, but trust me, it’s worth every second.
Step 3: Mix Dry Ingredients
Take the pan off the heat and stir in vanilla and salt. Then, dump in your cocoa powder and cookie crumbs—the mixture will thicken up fast! Finally, fold in those chopped walnuts. You’ll feel the texture change as you mix—it goes from liquid gold to this thick, fudgy batter that smells absolutely incredible.
Step 4: Chill and Slice
Pour that luscious mixture into your prepared pan and smooth the top. Press those walnut halves gently into the surface—they make it look fancy! Now, the hardest part: pop it in the fridge for at least 2 hours until firm. I know, waiting is tough, but it’s the secret to getting perfect, clean slices!
Tips for Perfect No Bake Chocolate Bars
After making these bars more times than I can count, I’ve picked up some tricks that take them from good to “oh-my-gosh-I-need-another-piece” amazing:
- Toast those walnuts: Just 5 minutes in a dry pan brings out their nutty magic. Your kitchen will smell incredible!
- Room temp butter is key: Too cold and it won’t melt smoothly; too warm and your mixture gets greasy. Goldilocks was right—it’s gotta be just right!
- Chill time matters: I know it’s tempting to cut early, but 2 full hours gives you clean slices that won’t crumble.
- Slice cold, serve cool: Run your knife under hot water and wipe dry between cuts for picture-perfect squares.
Little things make big differences—especially when chocolate’s involved!
Variations and Substitutions
Listen, I love the original version—but sometimes you gotta mix things up! Here are my favorite twists:
- Nut swaps: Almonds or pecans work beautifully instead of walnuts. For nut-free? Try toasted coconut flakes!
- Cookie crumbs: Gluten-free Oreos or graham crackers make easy substitutes without losing texture.
- Chocolate choices: Swap semisweet for dark chocolate if you like it richer, or milk chocolate for extra sweetness.
- Add-ins: A handful of mini marshmallows or dried cherries? Yes please! Just fold them in with the walnuts.
The beauty of these bars? They’re like a blank chocolate canvas—have fun with it!
Serving and Storing No Bake Chocolate Bars
Here’s the best way to enjoy these beauties: serve them straight from the fridge—that cool, fudgy bite is pure bliss! I like to arrange them on a pretty plate with extra walnut halves scattered around. They’ll keep like a dream in an airtight container for up to 5 days (if they last that long!). Pro tip: layer them between parchment sheets to prevent sticking. Room temp is fine for serving, but I always sneak mine cold—that texture is just too good!
Nutritional Information
Okay, let’s be real—these no bake chocolate bars are a treat, not health food! But hey, a little indulgence never hurt anyone. Here’s the scoop per bar (based on my ingredients—yours may vary slightly):
- 310 calories: Worth every single one!
- 22g fat: Mostly from the good stuff—chocolate and walnuts.
- 28g carbs: Sweet, sweet happiness.
- 3g fiber: Thank you, cocoa powder!
Remember, these are estimates—your exact numbers depend on brands and how generously you slice!
Frequently Asked Questions
I get asked about these no bake chocolate bars all the time—here are the answers to the most common questions:
Can I use milk chocolate instead of semisweet?
Absolutely! Milk chocolate makes these bars extra sweet and creamy. Just reduce the sweetened condensed milk by a tablespoon or two—trust me, it’ll balance perfectly.
How do I make these nut-free?
Easy! Skip the walnuts and add toasted coconut or crispy rice cereal instead. The texture stays amazing, and nobody misses the nuts.
Why won’t my bars set properly?
Two likely culprits: not enough chilling time (be patient—2 hours minimum!) or not enough cookie crumbs. The crumbs help bind everything together.
Can I freeze these?
You bet! They freeze beautifully for up to a month. Just thaw in the fridge overnight—they’ll taste freshly made.
Share Your Experience
Did you make these no bake chocolate bars? I’d love to hear how they turned out! Drop a comment below or snap a photo—nothing makes me happier than seeing your chocolatey creations. And hey, if you’ve got any brilliant twists on the recipe, spill the beans (or should I say, the chocolate chips?). Happy baking—or should I say, happy no-baking!
Print
15-Minute No Bake Chocolate Bars: Ridiculously Fudgy & Easy
- Total Time: 2 hours 20 minutes
- Yield: 12 bars 1x
- Diet: Vegetarian
Description
Easy no-bake chocolate bars with a fudgy texture and nutty crunch.
Ingredients
- 2 cups semisweet chocolate chips
- 1/2 cup unsalted butter
- 1/2 cup sweetened condensed milk
- 1 teaspoon vanilla extract
- 1/4 teaspoon salt
- 1/3 cup unsweetened cocoa powder
- 1 cup chocolate cookie crumbs
- 3/4 cup chopped walnuts
- 12 walnut halves, for topping
Instructions
- Line an 8-inch square pan or small tray with parchment paper.
- Add the chocolate chips, butter, and sweetened condensed milk to a saucepan over low heat. Stir until fully melted and smooth.
- Remove from the heat and stir in the vanilla extract and salt.
- Add the cocoa powder and chocolate cookie crumbs. Mix until thick and glossy.
- Fold in the chopped walnuts.
- Press the mixture evenly into the prepared pan.
- Top with walnut halves and gently press them into the surface.
- Chill for 2 hours, or until firm.
- Slice into squares and serve cold or at cool room temperature.
Notes
- Store in an airtight container in the refrigerator for up to 5 days.
- For a smoother texture, grind walnuts finely.
- Prep Time: 15 minutes
- Cook Time: 5 minutes
- Category: Dessert
- Method: No-Bake
- Cuisine: American
Nutrition
- Serving Size: 1 bar
- Calories: 310
- Sugar: 20g
- Sodium: 50mg
- Fat: 22g
- Saturated Fat: 11g
- Unsaturated Fat: 9g
- Trans Fat: 0g
- Carbohydrates: 28g
- Fiber: 3g
- Protein: 4g
- Cholesterol: 25mg
Keywords: no bake chocolate bars, easy no bake dessert, quick chocolate dessert, no bake brownies, fudgy walnut bars, chocolate dessert squares