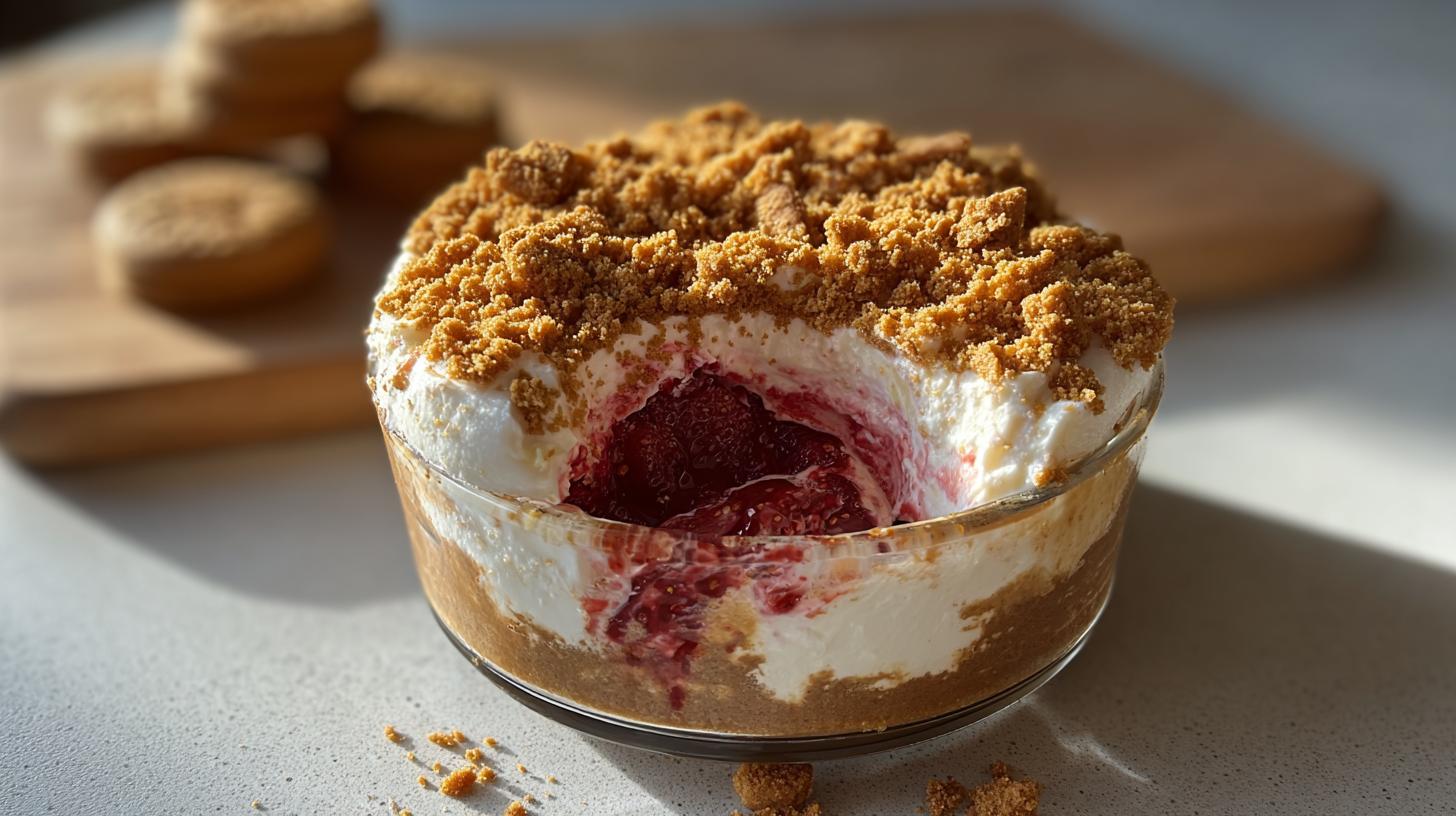
Picture this: It’s a sweltering summer afternoon, your kitchen feels like a sauna, and the last thing you want is to turn on the oven. That’s exactly when I fell head over heels for this no-bake Biscoff cheesecake recipe. Game changer! The moment that first creamy, dreamy bite hits your tongue—with that sweet strawberry surprise in the center—you’ll understand why this became my go-to dessert. No fancy skills required, just pure cookie butter bliss that comes together faster than you can say “Lotus Biscoff.” Trust me, one spoonful of this velvety cheesecake filling and you’ll be hooked!
Why You’ll Love This No-Bake Biscoff Cheesecake
Okay, let me count the ways you’re going to adore these little cups of heaven:
- Zero oven time – Perfect for when it’s hot or you’re just feeling lazy (no judgement here!)
- Creamy meets crunchy – That velvety cheesecake filling against the Biscoff cookie crust? Pure magic
- Sweet strawberry surprise – The tart berry center cuts through the rich cookie butter flavor beautifully
- Foolproof assembly – If you can stir and spread, you can make this dessert
- Make-ahead dream – These actually get better after chilling overnight (if they last that long!)
Seriously, it’s like eating cookie butter clouds with a strawberry sunset in the middle. You’re welcome.
Ingredients for No-Bake Biscoff Cheesecake
Gather these goodies before we dive in – trust me, measuring everything out first makes this recipe fly by. And don’t worry, most of these are pantry staples with a few special stars (looking at you, cookie butter!).
- 2 cups Lotus Biscoff cookie crumbs – About 20 cookies blitzed in a food processor (or smashed in a bag with a rolling pin if you need stress relief!)
- 6 tablespoons unsalted butter, melted – Just until liquid, not sizzling hot
- 1 tablespoon brown sugar – The dark kind, for extra caramel depth
- 16 ounces cream cheese, softened – Leave it out for 30 minutes – no shortcuts here or you’ll get lumps!
- 3/4 cup powdered sugar – Sift it if yours is clumpy
- 1 teaspoon vanilla extract – The real stuff, not imitation
- 1 cup heavy whipping cream, cold – Straight from the fridge is key for perfect peaks
- 1/3 cup Biscoff cookie butter, softened – Microwave for 10 seconds if it’s stubborn
For that gorgeous strawberry center:
- 1 cup fresh strawberries, chopped – About 6 medium berries, hulled
- 2 tablespoons granulated sugar – Adjust to your berry sweetness
- 1 teaspoon lemon juice – Brightens the whole flavor profile
- 1 teaspoon cornstarch + 1 tablespoon water – Our magic thickener
The fun finishing touches:
- 1 cup Lotus Biscoff cookie crumbs (for coating) – Extra crunch factor
- 2-3 Lotus Biscoff cookies, roughly crushed (for topping) – Because more is always better
See? Nothing too wild – just quality ingredients that’ll make your taste buds dance. Now let’s get mixing!
Equipment You’ll Need
No fancy gadgets required here! Just grab these basics from your kitchen – chances are you’ve got most already:
- 4 ramekins or dessert cups – I use 6-ounce ones, but anything similar works (even clean glass jars in a pinch!)
- Mixing bowls – One medium for the crust, one large for the filling
- Electric hand mixer or stand mixer – For whipping that cream to pillowy perfection (you could whisk by hand, but your arms might protest)
- Small saucepan – For cooking that luscious strawberry filling
- Spatula – My trusty silicone one never lets me down for folding
- Measuring cups and spoons – Eyeballing measurements is risky business with cheesecake
- Food processor or plastic bag + rolling pin – To crush those Biscoff cookies into crumbs (therapeutic either way!)
That’s it! See? Told you this was an easy one. Now let’s make some magic happen.
How to Make No-Bake Biscoff Cheesecake
Preparing the Strawberry Filling
First, let’s tackle that gorgeous strawberry center. Toss your chopped berries, sugar, and lemon juice into a small saucepan over medium heat. You’ll know it’s ready when the berries soften and release their juices – about 4-5 minutes of gentle bubbling. Whisk together the cornstarch and water, then stir it into the berry mixture. Cook another minute until it thickens to a jammy consistency (no watery puddles allowed!). Let this cool completely – I pop mine in the fridge while I work on the crust.
Making the Biscoff Crust
Time for the crunchy foundation! Mix your Biscoff crumbs with melted butter and that spoonful of brown sugar until it resembles wet sand. Now here’s my trick: divide this between your ramekins and press firmly with the back of a spoon (I use a small glass to really pack it down). Chill these for at least 10 minutes – this helps the crust hold its shape when we add the filling.
Whipping the Cream Cheese Filling
Now the star of the show – that cloud-like filling. Beat your softened cream cheese first (no lumps allowed!), then add powdered sugar, vanilla, and cookie butter. When it’s silky smooth, whip your cold heavy cream in another bowl until stiff peaks form – the spoon should stand straight up when you’re done. Gently fold the whipped cream into the cream cheese mixture in three additions. Be patient here! You want to keep all that airiness for the perfect light texture.
Assembling the Cheesecake Cups
Showtime! Spoon half the filling over your chilled crusts. Now make a little well in each center and add a tablespoon of cooled strawberry filling – don’t overfill! Top with remaining cheesecake mixture, smoothing with a spatula. Here’s the messy fun part: coat the sides with extra Biscoff crumbs (I roll the cups gently in a shallow dish of crumbs). Refrigerate at least 4 hours – overnight is even better. The wait is torture, but so worth it!
Tips for Perfect No-Bake Biscoff Cheesecake
After making these cheesecake cups more times than I can count (research purposes, obviously), here are my foolproof tips to guarantee perfection every single time:
- Chill your bowl and beaters before whipping the cream – cold tools = faster, fluffier peaks
- Patience with softening – Let cream cheese sit out until it yields to gentle pressure (about 30 minutes). Microwaving creates hot spots that lead to lumps!
- Strain strawberry filling if your berries were extra juicy – just press through a fine mesh sieve to remove excess liquid
- Layer strategically – Keep the strawberry center small and centered so it doesn’t leak through the sides
- Run a knife around the edges before unmolding if you’re serving them plated – makes for cleaner presentation
- Crumb coating hack – Press extra Biscoff crumbs onto the sides while the filling is still slightly sticky for maximum adhesion
- Storage smarts – Keep in an airtight container in the fridge up to 3 days (if they last that long!)
Oh! And my golden rule? Taste the filling before assembling – you might want an extra spoonful of cookie butter. Not that I’d know anything about that…
Variations of No-Bake Biscoff Cheesecake
Once you’ve mastered the original (and licked the bowl clean a few times), try these fun twists to keep things exciting. My family can’t decide which version they love more!
- Chocolate lovers’ dream: Drizzle melted dark chocolate over the finished cups or mix 2 tablespoons cocoa powder into the filling
- Raspberry ripple: Swap strawberries for raspberries in the filling and add a teaspoon of seedless jam to the cheesecake mixture
- Peanut butter twist: Replace half the cookie butter with creamy peanut butter for that classic PB cookie combo
- Tropical vibes: Use mango or passionfruit puree instead of strawberry – the tartness cuts through the richness beautifully
- Espresso kick: Stir 1 tablespoon instant espresso powder into the filling for a grown-up coffee version
- Mini versions: Make bite-sized treats in a muffin tin – perfect for parties (just reduce chilling time to 2 hours)
The best part? You can mix and match these ideas – I once did chocolate-drizzled peanut butter cups with raspberry centers and… well, let’s just say they disappeared fast!
Serving and Storing No-Bake Biscoff Cheesecake
Okay, the hardest part is over—now comes the glorious payoff! These cheesecake cups need at least 4 hours in the fridge to set properly (I know, the wait is brutal). But here’s a secret: they’re actually even better the next day when all those flavors have really gotten to know each other.
When you’re ready to serve, take them out about 10 minutes before digging in—just to take the chill off slightly. The texture becomes perfectly creamy rather than fridge-cold. I love garnishing each one with a whole Biscoff cookie perched on top and maybe a few fresh strawberry slices if I’m feeling fancy. For extra drama, dust with powdered sugar right before serving—it makes those cookie crumbs pop!
Now, about leftovers (as if!): if by some miracle you have any, just pop them back in their ramekins or transfer to an airtight container. They’ll keep beautifully in the fridge for up to 3 days—the crust might soften slightly but the flavor just gets more amazing. Pro tip: store any extra crumbs separately in a baggie to maintain that satisfying crunch when you’re ready for round two.
One important note—don’t freeze these! The texture of the whipped cream filling turns grainy when thawed. Trust me, I learned this the hard way after a late-night “science experiment.” Better to just enjoy them fresh or share with lucky neighbors!
No-Bake Biscoff Cheesecake FAQs
I’ve gotten so many questions about these little cups of joy since I started making them, so let me answer the most common ones right here. Trust me, if you’re wondering about it, someone else probably is too!
Can I use a different cookie for the crust?
Absolutely! While Biscoff crumbs give that special caramelized flavor, graham crackers or digestive biscuits work in a pinch. Just add an extra tablespoon of brown sugar to mimic that deep flavor.
My filling seems runny—what went wrong?
Two likely culprits: either your cream wasn’t cold enough when whipping (stick that bowl in the freezer next time!), or you didn’t let the strawberry filling cool completely before assembling. Pop everything back in the fridge for an extra hour—they’ll firm up!
Can I make these ahead for a party?
Music to my ears—yes! These no-bake beauties are perfect make-ahead desserts. Assemble them the night before, and they’ll actually taste even better after chilling overnight. Just add fresh cookie toppings right before serving.
Help! I can’t find Biscoff cookie butter.
No panic—you can make your own by blending 10 Biscoff cookies with 2 tablespoons melted butter and 1 tablespoon oil until smooth. Or use peanut butter for a different (but still delicious) twist!
Any dairy-free substitutions?
For the filling, try dairy-free cream cheese and coconut cream (chilled overnight, then whipped). The crust works great with vegan butter. Just know the texture will be slightly different but still totally crave-worthy.
Why did my strawberry center sink to the bottom?
Ah, the classic dessert drama! Next time, make sure your first layer of cheesecake filling is thick enough to support the berry layer, and don’t overfill the strawberry portion—about a tablespoon per cup is perfect.
Can I make one big cheesecake instead of individual cups?
You bet! Use a 7-inch springform pan, triple the crust recipe, and chill for at least 6 hours. Slice carefully—the strawberry center makes it extra delicate.
Still have questions? Drop them in the comments—I test every variation imaginable and love swapping kitchen hacks. Happy no-bake cheesecake making, friends!
Nutritional Information
Let’s be real—we’re not eating cheesecake for its health benefits, but here’s the scoop on what’s in each indulgent cup (because knowledge is power, right?). These estimates are for one serving, based on my standard recipe:
- Calories: 430
- Total Fat: 29g (16g saturated, 10g unsaturated)
- Cholesterol: 75mg
- Sodium: 220mg
- Total Carbohydrates: 38g
- Dietary Fiber: 1g
- Sugars: 28g
- Protein: 5g
Now for the fine print: these numbers can vary based on exact ingredients used (I’m looking at you, extra generous cookie butter scoopers!). Using reduced-fat cream cheese or less sugar in the strawberry filling will adjust the counts. The nutrition gods require me to say this is just an estimate—for precise numbers, you’d need to calculate based on your specific brands and measurements.
The good news? Those happy endorphins from eating something this delicious aren’t factored into the nutritional data… and those are 100% guilt-free!
Share Your No-Bake Biscoff Cheesecake
Okay, confession time—I need to see your gorgeous cheesecake creations! Did you stick with the classic strawberry center or try one of those wild variations? Maybe you discovered an even better trick for getting those sides perfectly coated in crumbs? Spill all your secrets in the comments below—I read every single one (and usually end up making midnight snack runs because your descriptions make me crave these all over again).
Snap a photo of your masterpiece before it disappears (we both know how quickly that happens) and tag me on Pinterest—I love featuring your brilliant adaptations in my stories. And if you’ve got a picky eater who suddenly became a cheesecake fan after trying these, you have to tell me that story. Nothing makes me happier than hearing how these little cups bring people together, just like they do in my own chaotic kitchen.
Oh! And if you run into any hiccups along the way, shout out—we’ve all been there (remember my freezer experiment fail?). Between all of us, we’ll troubleshoot any dessert drama. Now go forth and cheesecake, my friends! Can’t wait to see what you create.
Print
“3-Ingredient No-Bake Biscoff Cheesecake You’ll Crave Daily”
- Total Time: 4 hours 30 minutes
- Yield: 4 servings 1x
- Diet: Vegetarian
Description
A creamy, no-bake Biscoff cheesecake with a strawberry center, perfect for easy dessert cups.
Ingredients
- 2 cups Lotus Biscoff cookie crumbs
- 6 tablespoons unsalted butter, melted
- 1 tablespoon brown sugar
- 16 ounces cream cheese, softened
- 3/4 cup powdered sugar
- 1 teaspoon vanilla extract
- 1 cup heavy whipping cream, cold
- 1/3 cup Biscoff cookie butter, softened
- 1 cup fresh strawberries, chopped
- 2 tablespoons granulated sugar
- 1 teaspoon lemon juice
- 1 teaspoon cornstarch
- 1 tablespoon water
- 1 cup Lotus Biscoff cookie crumbs (for coating)
- 2 to 3 Lotus Biscoff cookies, roughly crushed (for topping)
Instructions
- In a small saucepan, cook strawberries, sugar, and lemon juice for 4-5 minutes until soft.
- Mix cornstarch with water, add to strawberries, and cook 1-2 more minutes until thickened. Let cool.
- Combine Biscoff crumbs, melted butter, and brown sugar in a bowl.
- Press part of the crumb mix into 4 ramekins or molds. Chill for 10 minutes.
- Beat cream cheese until smooth.
- Add powdered sugar, vanilla, and Biscoff cookie butter. Beat until creamy.
- Whip cold heavy cream until stiff peaks form.
- Fold whipped cream into the cream cheese mixture until fluffy.
- Spoon half the cheesecake filling into the molds.
- Add a spoonful of strawberry mixture in the center of each.
- Cover with remaining filling and smooth the tops.
- Sprinkle extra Biscoff crumbs on top and sides.
- Chill for at least 4 hours until set.
- Unmold carefully, top with crushed Biscoff cookies, and serve cold.
Notes
- Use cold cream for best whipping results.
- Let the strawberry mixture cool completely before adding to the filling.
- Chill the cheesecakes thoroughly for clean unmolding.
- Prep Time: 20 minutes
- Cook Time: 10 minutes
- Category: Dessert
- Method: No-Bake
- Cuisine: European
Nutrition
- Serving Size: 1 cheesecake cup
- Calories: 430
- Sugar: 28g
- Sodium: 220mg
- Fat: 29g
- Saturated Fat: 16g
- Unsaturated Fat: 10g
- Trans Fat: 0g
- Carbohydrates: 38g
- Fiber: 1g
- Protein: 5g
- Cholesterol: 75mg
Keywords: no-bake Biscoff cheesecake, Lotus Biscoff dessert, cookie butter cheesecake, strawberry cheesecake cups, easy no-bake cheesecake, creamy Biscoff dessert