Okay, I’ll confess—I’ve been obsessed with these mini tiramisu cheesecake cups ever since I first made them for a last-minute dinner party. You know those moments when you need something impressive but don’t want to spend hours in the kitchen? These little beauties are my go-to. They combine everything I love about classic Italian tiramisu—those coffee-kissed ladyfingers, creamy mascarpone—with the rich indulgence of cheesecake, all in perfect single-serving portions. No slicing, no mess, just pure dessert happiness. I’ve tweaked this recipe over years of testing (and many, many tastings) to get the balance just right—enough coffee flavor to wake up your taste buds but still luxuriously smooth. Trust me, once you try these, you’ll be making them for every special occasion… or just because it’s Tuesday.
Why You’ll Love These Mini Tiramisu Cheesecake Cups
Listen, these little cups are pure magic—here’s why you’ll be obsessed too:
- No oven required (perfect for summer or when you just can’t deal with baking)
- Individually portioned—no fighting over who got the bigger slice
- That cloud-like mascarpone filling melts in your mouth (I may have licked the bowl clean… twice)
- The coffee-kissed ladyfingers give just the right caffeine kick—great for dessert AND a pick-me-up
- They look fancy as heck but take 20 minutes of actual work (our secret!)
Seriously, these disappear faster than I can make them—just warning you now!
Ingredients for Mini Tiramisu Cheesecake Cups
Gather these goodies—I promise every ingredient plays a special role in creating that perfect tiramisu-cheesecake hybrid magic. Pro tip: set everything out first so you’re not scrambling mid-recipe (learned that the hard way when my mascarpone was still rock-hard!).
- 8–10 ladyfingers (savoiardi) – Break them to fit your cups; the crisp texture is key
- 3/4 cup strong brewed coffee or espresso – Cooled completely (I pop mine in the freezer for 10 minutes if I’m impatient)
- 1 tbsp granulated sugar – Optional, but takes the edge off bitter coffee
- 1 tsp vanilla extract – The good stuff, not imitation!
- 8 oz cream cheese – Softened (leave it out 30 minutes—no shortcuts!)
- 8 oz mascarpone cheese – Must be chilled (warm mascarpone turns grainy—disaster!)
- 1/2 cup powdered sugar – Sifted if you’re feeling fancy
- 1 cup heavy whipping cream – Cold as your ex’s heart (warm cream won’t whip properly)
- Unsweetened cocoa powder – For that iconic dusting (I use a fine-mesh sieve for pro-level sprinkles)
- 1–2 tbsp coffee liqueur or rum – Optional but oh-so-worth-it for grown-up versions
See? Nothing weird or hard-to-find—just quality ingredients treated right. Now let’s make some magic!
How to Make Mini Tiramisu Cheesecake Cups
Okay, let’s get to the fun part! These mini cups come together like a dream—just follow these steps carefully (learned from my many “oops” moments). The key? Don’t rush the chilling time. I know, I know, waiting is torture when you’re craving dessert, but trust me, it makes ALL the difference.
Step 1: Prepare the Coffee Mixture
First, brew your coffee strong—think “could wake a sleeping bear” strength. I use espresso when I’m feeling fancy, but good dark roast works too. Let it cool completely (hot coffee turns ladyfingers into mush—been there!). Stir in that tablespoon of sugar if you like your desserts on the sweeter side, plus vanilla and booze if using (Kahlúa is my go-to). This mixture should taste like a delicious iced coffee—have a sip to test! Too bitter? Add a pinch more sugar. Too sweet? Add a splash more coffee. Get it just right before dipping.
Step 2: Make the Mascarpone Cheesecake Filling
Now for the creamy magic! Beat the softened cream cheese first—get it completely smooth with no lumps (I use my stand mixer, but a hand mixer works too). Add the chilled mascarpone, powdered sugar, and vanilla. Mix just until combined—overbeating makes it runny, and nobody wants soup for dessert! In another bowl, whip that cold heavy cream to stiff peaks (turn the bowl upside down—if it stays put, you’re golden). Gently fold the whipped cream into the cheese mixture with a spatula. This keeps the filling light as a cloud. Lick the spatula—chef’s privilege!
Step 3: Assemble the Cups
Here’s where the magic happens! Quickly dip each ladyfinger in the coffee—I’m talking one-second dip max. Any longer and they’ll disintegrate (learned that the messy way). Place a layer in each cup. Add a generous spoonful of filling. Repeat with another layer of dipped ladyfingers and more filling. Smooth the tops with the back of a spoon—you want them pretty! Now the hard part: refrigerate at least 4 hours (overnight is better). I know it’s tempting, but don’t skip this! The flavors need time to mingle and the layers need to set. Right before serving, dust with cocoa powder through a fine sieve—it’s like edible fairy dust!
Tips for Perfect Mini Tiramisu Cheesecake Cups
After making these cups more times than I can count (and eating even more!), here are my hard-won secrets for tiramisu perfection:
- Keep everything cold—especially the mascarpone and cream. Warm ingredients make the filling weep (sad, soupy cheesecake is no one’s friend).
- Use espresso if you can—it gives that deep coffee punch without watering down the ladyfingers.
- Dust cocoa powder right before serving—otherwise it melts into the filling and looks dull (still tasty, but we eat with our eyes first!).
- Chill the cups at least 4 hours—I know it’s torture, but the texture transforms from good to “oh-my-gosh” amazing.
- Dip ladyfingers like you’re scared of coffee—seriously, one Mississippi and out! Soggy bottoms ruin everything.
Follow these, and you’ll get rave reviews—promise!
Ingredient Substitutions & Variations
Life happens—sometimes you’re out of mascarpone or feeding gluten-free friends. No worries! Here are my favorite swaps that still taste amazing:
- No coffee liqueur? Dark rum works beautifully, or just skip it—the coffee flavor still shines.
- Gluten-free folks? Use gluten-free ladyfingers (check the coffee-dip time—they sometimes soften faster).
- Light cream cheese can sub for regular in a pinch, but expect a slightly less rich filling.
- Vegan version? Try coconut cream instead of heavy cream and vegan cream cheese—the texture won’t be identical but still delicious!
- Extra fancy? Add a layer of chocolate ganache or sprinkle espresso powder between layers for serious coffee lovers.
The beauty of this recipe? It’s forgiving—make it your own!
Serving and Storage Instructions
These little cups taste best straight from the fridge—that chill makes the creamy filling extra dreamy! Right before serving, I love adding chocolate curls or a sprinkle of espresso powder for extra flair. They’ll keep beautifully in the fridge for up to 3 days (if they last that long!), just cover tightly with plastic wrap. Heads up—don’t freeze them. The texture goes weird and the ladyfingers turn to mush (trust me, I’ve cried over freezer-burned tiramisu before!). Serve them cold, watch eyes light up, and take all the compliments!
Mini Tiramisu Cheesecake Cups Nutritional Information
Each little cup packs about 410 calories, with most coming from that luscious mascarpone and cream (worth every bite!). You’re looking at 30g fat (hey, it’s dessert—live a little!) and 20g sugar per serving. Of course, these numbers shift if you tweak ingredients—less sugar in the coffee or light cream cheese will trim it down. But let’s be real… sometimes you just need that full, glorious indulgence!
FAQs About Mini Tiramisu Cheesecake Cups
Can I make these ahead? Absolutely! These tiramisu cups actually taste better after chilling overnight—the flavors meld beautifully. Just wait to dust with cocoa powder until right before serving so it stays pretty.
How do I prevent soggy ladyfingers? The trick is speed! Dip each ladyfinger for just one second in the coffee—any longer and they’ll turn mushy. Think “quick kiss” rather than a soak. Also, make sure your coffee is cooled completely—hot liquid accelerates sogginess.
Can I skip the alcohol? Of course! The coffee flavor still shines without it. If you want extra depth, try adding 1/4 tsp instant espresso powder to the coffee mixture instead. Kids and non-drinkers will love these too!
What’s the best way to layer the cups? I do coffee-dipped ladyfingers first, then mascarpone cheesecake filling, repeating once more. Pro tip: gently press down the first layer of ladyfingers so they’re flat—this prevents wobbly layers!
Can I use different cups? Get creative! I’ve used everything from fancy glass dessert cups to simple mason jars. Just adjust the ladyfinger pieces to fit. Wider cups show off those beautiful layers best!
Share Your Experience
I’d love to hear how your mini tiramisu cheesecake cups turn out! Tag me on Instagram @[YourHandle] so I can see your gorgeous creations—extra points if you caught a cocoa powder mishap (we’ve all been there!). Leave a comment below with your tweaks or questions too—I read every one while nibbling on… well, probably more tiramisu.
Print
30-Minute Mini Tiramisu Cheesecake Cups – Irresistible Bliss
- Total Time: 4 hours 20 minutes
- Yield: 8 servings 1x
- Diet: Vegetarian
Description
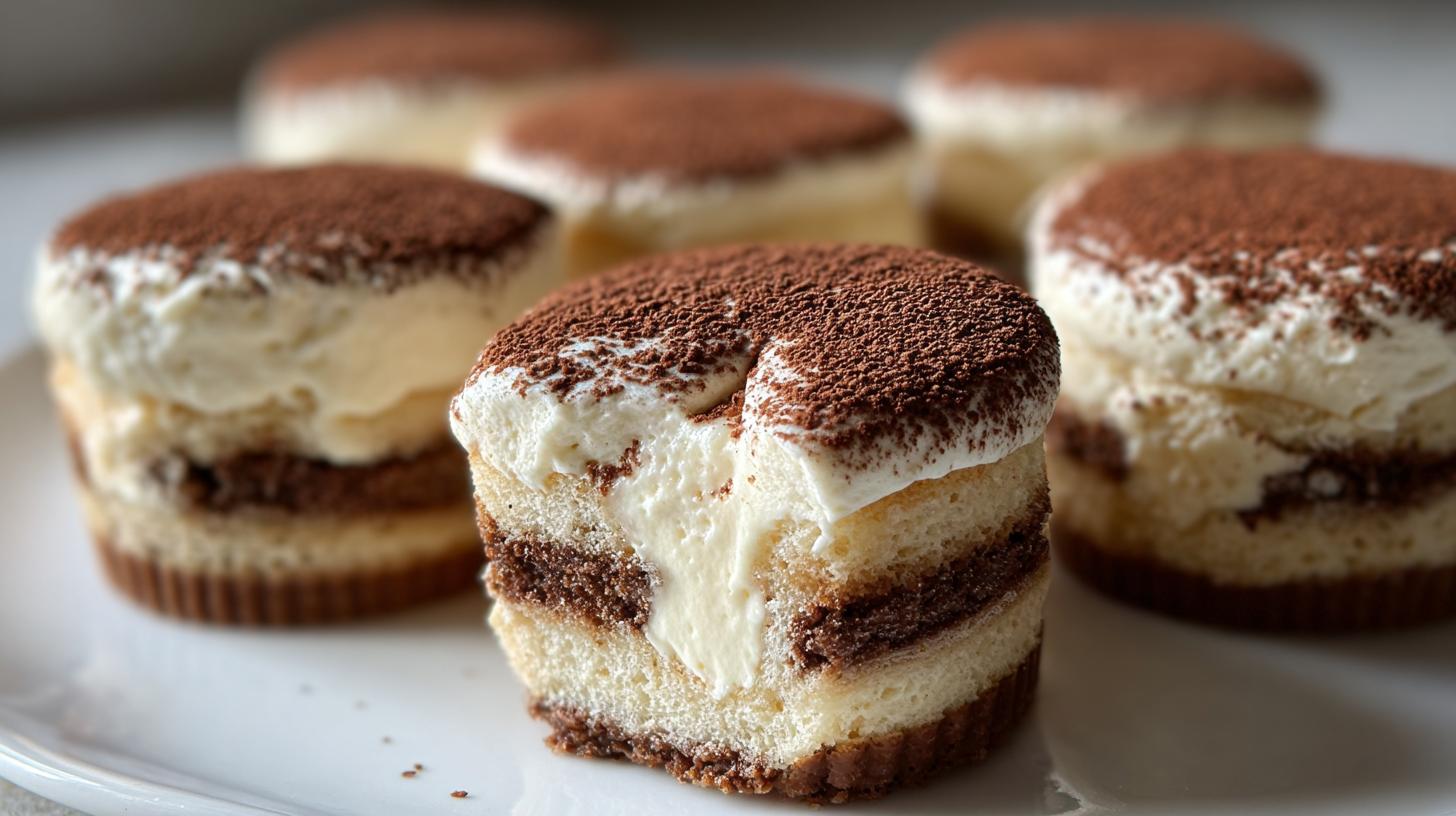
Mini Tiramisu Cheesecake Cups are a delightful dessert combining the flavors of tiramisu and cheesecake in individual servings. They feature layers of coffee-dipped ladyfingers and a creamy mascarpone cheesecake filling, dusted with cocoa powder.
Ingredients
- 8–10 ladyfingers (savoiardi), broken to fit cups
- 3/4 cup strong brewed coffee or espresso, cooled
- 1 tbsp granulated sugar (optional, to sweeten coffee)
- 1 tsp vanilla extract
- 8 oz cream cheese, softened
- 8 oz mascarpone cheese, chilled
- 1/2 cup powdered sugar
- 1 tsp vanilla extract
- 1 cup heavy whipping cream, cold
- Unsweetened cocoa powder, for dusting
- 1–2 tbsp coffee liqueur (Kahlúa) or rum (optional, stir into coffee)
- Chocolate curls/shavings (optional)
Instructions
- Stir sugar and vanilla into the cooled coffee (and liqueur if using).
- Beat cream cheese until smooth. Add mascarpone, powdered sugar, and vanilla; mix just until creamy.
- In a separate bowl, whip heavy cream to stiff peaks.
- Gently fold whipped cream into the mascarpone mixture until light and fluffy.
- Dip ladyfingers quickly into coffee (don’t soak) and place a layer in the bottom of each cup. Add a layer of filling.
- Repeat with another layer of coffee-dipped ladyfingers and more filling.
- Refrigerate at least 4 hours (overnight is best) so the layers set.
- Dust generously with cocoa powder right before serving.
Notes
- Use chilled mascarpone for best results.
- Don’t soak the ladyfingers—just a quick dip to avoid sogginess.
- For a stronger coffee flavor, add more coffee liqueur.
- Prep Time: 20 minutes
- Cook Time: 0 minutes
- Category: Dessert
- Method: No-Bake
- Cuisine: Italian
Nutrition
- Serving Size: 1 cup
- Calories: 410
- Sugar: 20g
- Sodium: 150mg
- Fat: 30g
- Saturated Fat: 18g
- Unsaturated Fat: 10g
- Trans Fat: 0g
- Carbohydrates: 25g
- Fiber: 1g
- Protein: 6g
- Cholesterol: 90mg
Keywords: mini tiramisu cheesecake cups, tiramisu cups, mascarpone cheesecake filling, ladyfinger dessert cups, coffee dessert recipe, cocoa dusted dessert