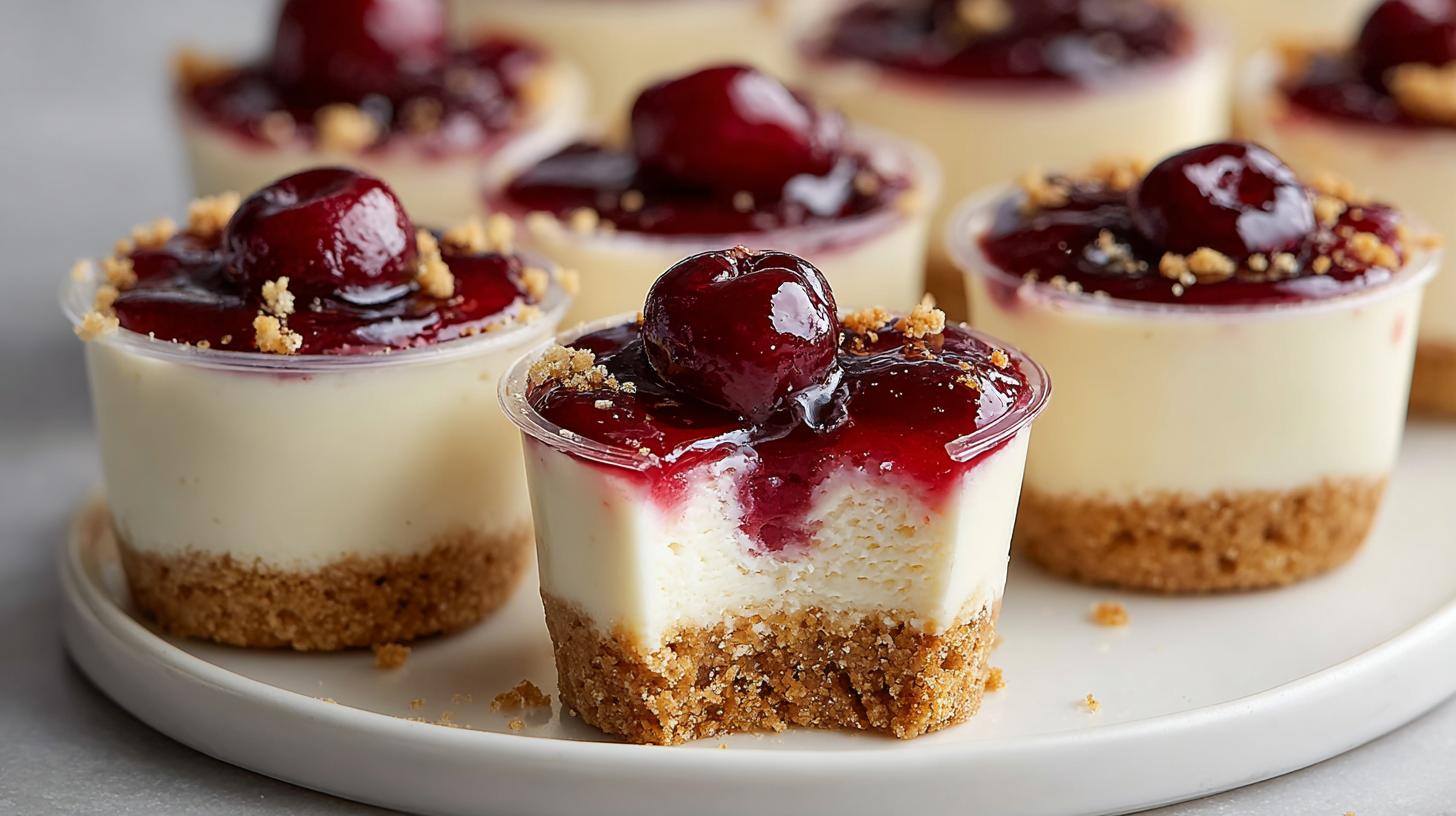
Picture this: it’s 30 minutes before your book club arrives, and you realize you forgot dessert. Panic sets in—until you remember these lifesaving mini cheesecake cups! I’ve lost count of how many times this no-bake miracle has saved my hosting bacon. Last summer, I threw together a batch for an impromptu pool party, and wouldn’t you know it? They disappeared faster than the kids could cannonball into the water. The best part? You probably have everything you need right in your kitchen—graham crackers, cream cheese, and whatever topping makes your heart sing (for me, it’s always those ruby-red cherries!). No oven required, totally customizable, and perfect for when you need something fancy-fast. Every time I make these, someone inevitably asks for the recipe—now it’s your turn to wow your crowd!
Why You’ll Love These Mini Cheesecake Cups
Let me count the ways these little cups of joy will become your new go-to dessert! Honestly, I make them so often I should probably buy stock in graham crackers. Here’s why they’re absolutely irresistible:
- No-bake magic: When it’s 90 degrees out and turning on the oven sounds like torture, these mini cheesecake cups are your cool, creamy salvation. Just mix, layer, and chill—that’s it!
- Party perfection: Individual desserts mean no messy slicing. I love watching guests’ faces light up when they get their own personal cheesecake—no sharing required!
- Endless flavor combos: Swap the cherries for fresh berries, chocolate drizzle, or even lemon curd. Last week I did salted caramel and pretzel crumbs—mind-blowing!
- Make-ahead dream: These actually taste better after chilling overnight, which means less stress when company’s coming. My secret? I always stash an extra batch in the fridge for surprise visitors.
- Kid-approved fun: Let little hands help press the crust or add toppings. My niece calls them “fancy pudding cups” and begs to make them every sleepover.
Trust me, once you try these mini cheesecake cups, you’ll start seeing excuses to make them everywhere—Tuesday counts as a special occasion, right?
Ingredients for Mini Cheesecake Cups
Okay, let’s talk ingredients! One of the best things about these mini cheesecake cups is how simple the shopping list is. I’ve made these in a pinch with just pantry staples – though I do recommend splurging on real butter and full-fat cream cheese. Trust me, it makes all the difference in texture and flavor. Here’s exactly what you’ll need, broken down into our three dreamy layers:
Crust Ingredients
The foundation of our little cheesecake wonders! This graham cracker crust is what dreams are made of – crunchy, buttery, and just sweet enough to balance the creamy filling.
- 1 1/2 cups graham cracker crumbs (about 10 full sheets, crushed fine – I whiz mine in the food processor)
- 6 tablespoons unsalted butter, melted (and slightly cooled – hot butter makes soggy crumbs)
- 2 tablespoons granulated sugar (this tiny bit adds the perfect sweetness without overpowering)
Pro tip: If you’re feeling fancy, add a pinch of cinnamon to the crust mixture – it adds this warm, nostalgic flavor that pairs amazingly with the cherries!
Cheesecake Filling Ingredients
This is where the magic happens! The filling comes together in minutes but tastes like you spent hours in the kitchen.
- 8 oz cream cheese, softened to room temperature (this is non-negotiable – cold cream cheese equals lumpy filling)
- 1/3 cup powdered sugar (sifted if yours is lumpy – we want silky smooth texture)
- 1 teaspoon pure vanilla extract (the good stuff makes all the difference)
- 1 cup whipped topping (like Cool Whip) OR 1 cup heavy cream, whipped to stiff peaks (I prefer fresh whipped cream for that cloud-like texture)
Confession time: Sometimes I sneak in a teaspoon of lemon zest when I’m feeling extra. It brightens up the whole dessert!
Topping Ingredients
The crowning glory! While I’m partial to classic cherry pie filling (it reminds me of diner cheesecakes from childhood), the topping options are endless.
- 1 (21 oz) can cherry pie filling (look for ones with plump cherries – the cheap brands tend to be mostly syrup)
Or try one of these easy swaps:
- Fresh strawberries macerated with a bit of sugar
- Blueberry compote (just simmer berries with a splash of lemon juice)
- Chocolate ganache drizzle with sea salt flakes
- Caramel sauce and chopped toasted pecans
See what I mean about options? The hardest part is choosing just one topping – though no one said you can’t do a variety for your next party!
How to Make Mini Cheesecake Cups
Alright, let’s get to the fun part—making these adorable mini cheesecake cups! I promise it’s easier than folding a fitted sheet (why are those things so impossible?). The whole process takes about 20 minutes of active work, then the fridge does the rest. Here’s exactly how I put mine together every time:
Prepare the Graham Cracker Crust
First things first—let’s make that irresistible crust! Grab a medium bowl and toss in your graham cracker crumbs, melted butter, and sugar. Now, here’s my trick: mix it with a fork first, then get in there with your hands. You want it to look like wet sand that just barely holds together when you pinch it.
Spoon about 1-2 tablespoons into each mini cup (I use those cute 3 oz plastic cups—perfect for parties!). Now, here’s the important part: press it down firmly with the back of a spoon or your fingers. Don’t be shy! A well-packed crust won’t crumble when you add the filling. I like to make mine go slightly up the sides too—extra crunch in every bite.
Quick tip: If you’re making these in advance, pop the crusts in the fridge for 10 minutes while you prep the filling. It helps them set up nicely.
Make the Cheesecake Filling
Time for the star of the show! In a large bowl, beat your softened cream cheese until it’s completely smooth—no lumps allowed! This usually takes me about 2 minutes with my hand mixer on medium. Scrape down the sides halfway through—those sneaky lumps love to hide there.
Add your powdered sugar and vanilla, then mix again until everything’s incorporated and looks creamy. Now here comes the magic: gently fold in your whipped topping or whipped cream. I use a rubber spatula and make big, slow folds—you want to keep all that airy lightness. The mixture should look like fluffy clouds when you’re done!
Confession: I always taste-test at this point. You know, for quality control. Just a spoonful… or three.
Assemble and Chill the Mini Cheesecake Cups
Now for the prettiest part! You can spoon the filling in, but I prefer piping—it looks fancier and is actually easier. Just scoop your filling into a piping bag (or a ziplock with the corner snipped off) and pipe about 2-3 tablespoons onto each crust. Smooth the tops with a butter knife if needed.
Top with your cherry pie filling (or whatever topping you’re using)—about a tablespoon per cup does the trick. Then comes the hardest part: waiting! These need at least 2 hours in the fridge to set properly, but overnight is even better. I know it’s tempting to dig in right away (trust me, I’ve been there), but patience gives you that perfect cheesecake texture.
When you’re ready to serve, just pull them out and watch them disappear! The compliments will start rolling in before the first bite—I guarantee it.
Tips for Perfect Mini Cheesecake Cups
After making these mini cheesecake cups more times than I can count (okay fine, I keep notes—it’s 47 batches as of last Tuesday), I’ve picked up some game-changing tricks. These little nuggets of wisdom will take your cups from “pretty good” to “where have you been all my life?” good:
Temperature matters—big time!
Here’s the deal—cold cream cheese equals lumpy filling, and nobody wants that. I leave my cream cheese out for at least 2 hours before mixing. No time? No problem! Microwave it for 10-second bursts until it’s soft but not melty. And while we’re at it, let your whipped topping or cream sit out for 15 minutes too—it blends way smoother.
Give your crusts a chill session
This might sound extra, but trust me—pop those crust-filled cups in the fridge for 10 minutes before adding filling. It helps the butter firm up so your layers stay distinct. I learned this the hard way after serving “cheesecake soup” at a baby shower once. Never again!
Pipe like a pro (even if you’re not)
Spooning filling works, but piping gives you those gorgeous, bakery-worthy swirls. Don’t have piping bags? Me neither half the time! A ziplock bag with the corner snipped off works perfectly. Bonus: piping lets you control portions so every cup gets the perfect cream-to-crust ratio.
The overnight advantage
I know, I know—waiting is torture when you’ve got cheesecake cups calling your name. But if you can resist for just one night, the flavors meld beautifully and the texture becomes dreamily firm. My trick? I make a double batch—one for now, one for tomorrow. Problem solved!
There you have it—my hard-earned secrets for mini cheesecake cup perfection. Follow these, and you’ll be the dessert hero at every gathering. Just don’t be surprised when people start requesting them by name—”Oh, you’re bringing those cheesecake cups, right?”
Variations and Substitutions
One of my favorite things about these mini cheesecake cups is how easily you can mix them up! I’m constantly playing around with different flavors and textures—sometimes just for fun, other times because I realize I’m out of graham crackers at 10pm (true story). Here are all my favorite ways to shake things up:
Crust Swaps That’ll Blow Your Mind
- Oreo crumbs: Replace graham crackers with crushed Oreos (cream filling and all) for a chocolatey twist. My nephew calls these “cookies and cream magic.”
- Shortbread cookies: Those buttery Walkers cookies make an insanely rich crust—perfect for fancy tea parties.
- Gingersnaps: Adds warm spice that pairs amazingly with lemon curd topping.
- Pretzels: Crushed pretzels + brown sugar makes the perfect sweet-salty base for caramel apple versions.
Filling Twists That Keep Things Interesting
- Chocolate lovers: Melt 1/2 cup chocolate chips, cool slightly, then fold into the filling. Top with chocolate shavings—decadence overload!
- Peanut butter bliss: Add 1/4 cup creamy PB to the filling mixture and top with banana slices.
- Berry swirl: Before chilling, gently swirl in some raspberry or strawberry jam for pretty marbled effect.
- Pumpkin spice: In fall, I mix in 1/4 cup pumpkin puree and pumpkin pie spice—tastes like Thanksgiving in a cup!
Topping Ideas That Steal the Show
- Fresh fruit: Macerated berries, mango chunks, or even grilled peaches in summer.
- Salted caramel: Drizzle store-bought or homemade caramel sauce and sprinkle with flaky sea salt.
- Tropical vibes: Toasted coconut flakes + pineapple tidbits = instant vacation.
- S’mores style: Mini marshmallows toasted with a kitchen torch and chocolate sauce.
Dietary-Friendly Options
- Dairy-free: Use coconut cream instead of whipped topping and vegan cream cheese (Kite Hill brand works great).
- Gluten-free: Swap in gluten-free graham crackers or almond flour mixed with melted butter.
- Lower sugar: Reduce sugar in crust by half and use sugar-free whipped topping.
The possibilities are seriously endless—I’ve even done a “breakfast” version with granola crust and yogurt filling! Whatever combo you choose, just remember: there’s no wrong way to make these mini cheesecake cups. Unless you forget to share. That’s definitely wrong.
Serving and Storage Instructions
Okay, let’s talk about the best ways to serve and store these little beauties—because let’s be real, you’ll probably want to make extras! (I always do.) Here’s everything I’ve learned about keeping mini cheesecake cups at their absolute best:
How to Serve Like a Pro
These taste best straight from the fridge—that chill makes the filling extra dreamy. I like to take them out about 5 minutes before serving so the flavors can wake up a bit. For fancy presentations, arrange them on a tiered stand or line them up on a pretty tray with small spoons. Pro tip: If you’re transporting them, nestle the cups in a baking sheet lined with a damp paper towel—it keeps them from sliding around in the car!
Storage Secrets
Here’s the good news—these keep beautifully in the fridge! Just cover them tightly with plastic wrap (I press it right against the surface to prevent drying) and they’ll stay fresh for up to 3 days. The crust might soften slightly by day three, but the flavor only gets better as the ingredients meld together.
Why Freezing Is a No-Go
I learned this the hard way—freezing changes the texture completely. The whipped topping or cream separates when thawed, leaving you with a grainy mess. Trust me, it’s not worth the heartbreak! If you must make ahead, the crusts can be frozen separately for up to a month, then just add fresh filling when you’re ready.
One last tip: If you’re prepping for a party, assemble everything except the toppings up to a day in advance. Add the cherries or fruit right before serving so they stay fresh-looking. Now go forth and cheesecake cup to your heart’s content—just don’t forget to save one for yourself!
Nutritional Information
Let’s be real—we’re not eating mini cheesecake cups for their nutritional benefits! But since folks always ask, here’s the scoop: these sweet treats are definitely an indulgence. The exact nutrition varies based on your specific ingredients—like whether you use full-fat cream cheese or light whipped topping, or pile on extra cherry topping (no judgment here!).
As with any dessert, enjoy these in moderation as part of a balanced diet. I like to think of them as little happiness boosters—sometimes that’s the best kind of nourishment! Remember, nutritional values are estimates and can change based on the brands and amounts you use.
FAQs About Mini Cheesecake Cups
After making these no-bake cheesecake cups for every occasion under the sun (yes, including “just because it’s Wednesday”), I’ve heard every question imaginable. Here are the answers to the ones that pop up most often—straight from my messy, cherry-stained notebook!
Can I freeze mini cheesecake cups?
Oh honey, I wish! Unfortunately, freezing makes the filling separate when it thaws—trust me, I sacrificed a whole batch to science trying to make it work. The texture turns grainy and weird. But here’s a workaround: you can freeze just the crusts for up to a month! Then simply add fresh filling when you’re ready to serve.
Can I use Greek yogurt instead of whipped topping?
You absolutely can—I’ve done it when I was in a pinch! Just know the texture will be denser and tangier. Strain the yogurt first to remove excess liquid, then fold it in gently. Bonus: it adds protein! Though my husband swears vanilla Greek yogurt versions taste like “health food trying to dress up as dessert.”
What else can I use besides cherry pie filling?
Where do I even start? Fresh berries tossed with a little sugar, homemade lemon curd, chocolate ganache—the world’s your oyster! Last month I did a caramel apple version with diced apples sautéed in cinnamon butter that had people licking their cups clean. For dessert parfait cups, try layering different fruits in each one.
How far in advance can I make these?
The sweet spot is 1-2 days ahead—the flavors actually improve as they mingle in the fridge! Just hold off on adding any fresh fruit toppings until right before serving so they don’t get soggy. Pro tip: Write the assembly date on the lid with a dry-erase marker so you don’t forget (learned that one the hard way).
Can I make these without individual cups?
Totally!omg This recipe works great in one big dish too—just press the crust into a 9×9 pan and spread the filling evenly. You’ll get about 16 squares instead of individual portions. I call it the “I’m-too-lazy-for-cups” method—perfect for family dinners when presentation isn’t the priority!
Print
“15 Irresistible Mini Cheesecake Cups That Will Steal the Show”
- Total Time: 2 hours 20 minutes
- Yield: 10 servings 1x
- Diet: Vegetarian
Description
Mini cheesecake cups are easy no-bake individual desserts perfect for parties.
Ingredients
- Crust
- 1 1/2 cups graham cracker crumbs
- 6 tbsp unsalted butter, melted
- 2 tbsp granulated sugar
- Cheesecake Filling
- 8 oz cream cheese, softened
- 1/3 cup powdered sugar
- 1 tsp vanilla extract
- 1 cup whipped topping (or 1 cup heavy cream, whipped to stiff peaks)
- Topping
- 1 (21 oz) can cherry pie filling (or your favorite fruit topping)
Instructions
- Make the crust: In a bowl, mix graham cracker crumbs, melted butter, and sugar until it looks like wet sand. Spoon about 1–2 tablespoons into each mini cup and press down gently.
- Make the filling: Beat cream cheese until smooth. Add powdered sugar and vanilla and mix until creamy. Fold in whipped topping (or whipped cream) until light and fluffy.
- Assemble: Pipe or spoon cheesecake filling over the crust (about 2–3 tablespoons per cup).
- Top: Spoon cherry pie filling on top of each cup.
- Chill: Refrigerate at least 2 hours (best overnight) until set. Serve cold.
Notes
- Use any fruit topping you prefer.
- For firmer filling, chill longer.
- Store covered in the fridge for up to 3 days.
- Prep Time: 20 minutes
- Cook Time: 0 minutes
- Category: Dessert
- Method: No-Bake
- Cuisine: American
Nutrition
- Serving Size: 1 mini cheesecake cup
- Calories: 260
- Sugar: 20g
- Sodium: 180mg
- Fat: 16g
- Saturated Fat: 9g
- Unsaturated Fat: 5g
- Trans Fat: 0g
- Carbohydrates: 26g
- Fiber: 1g
- Protein: 3g
- Cholesterol: 40mg
Keywords: mini cheesecake cups, no bake cheesecake cups, cherry cheesecake shooters, dessert parfait cups, individual party desserts, graham cracker crust dessert