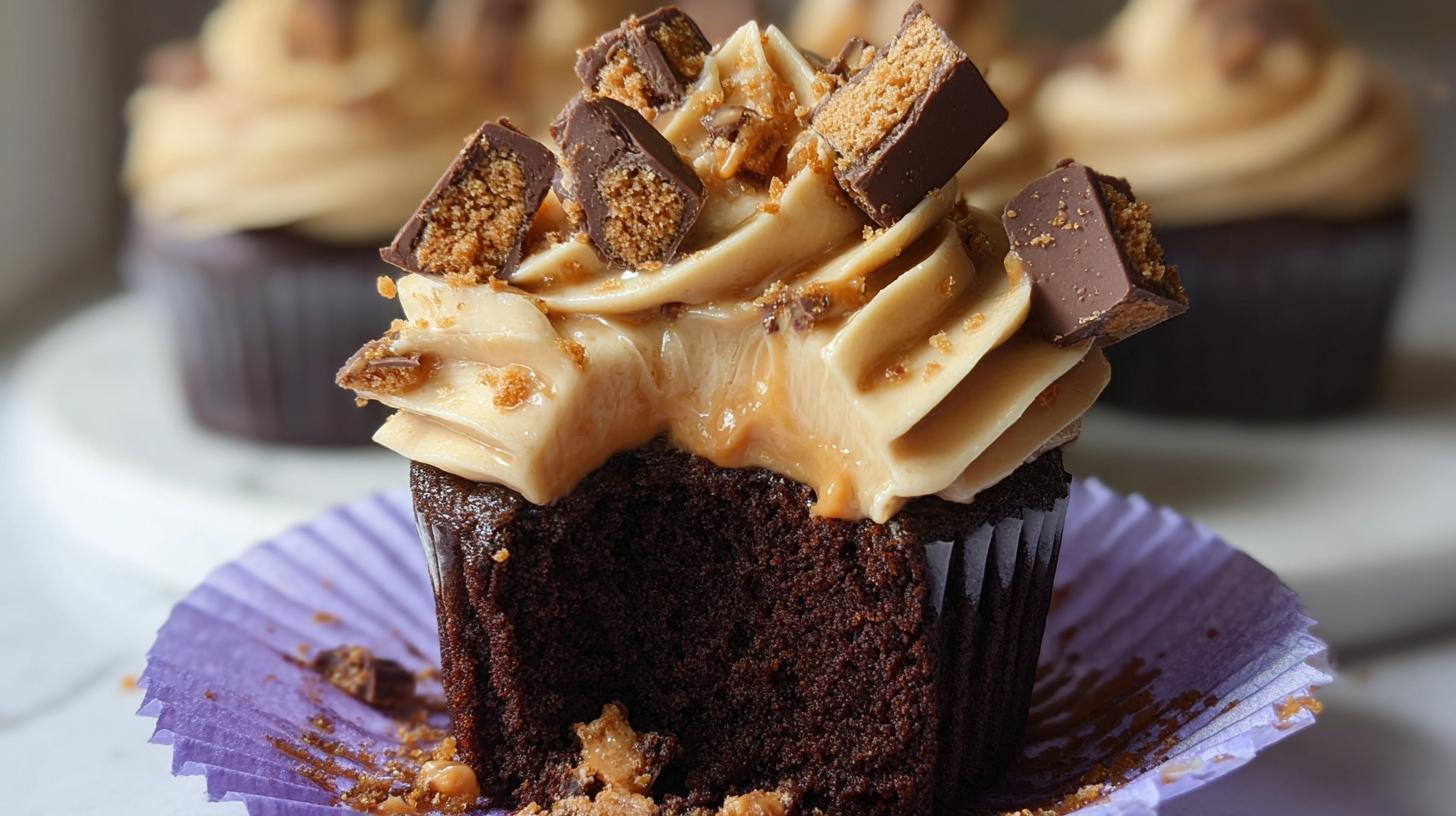
I’ll never forget the first time I brought these Butterfinger cupcakes to a potluck – they disappeared before I even got through the line! There’s something magical about that combination of rich chocolate cake, creamy peanut butter frosting, and those addictive Butterfinger crumbs crunching between your teeth. It’s like biting into your favorite candy bar, but better because it’s homemade.
These cupcakes strike the perfect balance – not too sweet, not too heavy, with just enough salty-sweet peanut butter to complement the deep chocolate flavor. And let’s be honest, the Butterfinger pieces aren’t just garnish – they’re the star of the show. Every bite gives you that satisfying crisp texture that makes people go “Mmm, what IS that?”
Trust me, whether it’s bake sales, birthday parties, or just a Tuesday night treat, these cupcakes always steal the show. My kids beg me to make them whenever report cards come home (bribery works!). The recipe comes together surprisingly fast, and the results look fancier than they really are – our little secret.
Butterfinger Cupcakes Ingredients
Okay, let’s talk ingredients – and I promise, nothing too fancy here! Everything you need for these showstopper cupcakes is probably already in your pantry (except maybe the Butterfingers, but trust me, they’re worth the extra trip to the candy aisle). I’ve broken it down so you can gather everything before diving in – my grandma always said “measure twice, bake once!”
For the Chocolate Cupcakes:
- Dry Ingredients:
- 1 1/4 cups all-purpose flour (spooned and leveled – no packing!)
- 1 cup granulated sugar
- 1/2 cup unsweetened cocoa powder (I use Dutch-processed for extra richness)
- 1 tsp baking powder
- 1/2 tsp baking soda
- 1/2 tsp salt (don’t skip this – it balances the sweetness)
- Wet Ingredients:
- 2 large eggs (room temperature – they’ll mix in smoother)
- 1/2 cup buttermilk (no buttermilk? Mix 1/2 tbsp lemon juice + regular milk)
- 1/3 cup vegetable oil (canola works too)
- 2 tsp vanilla extract (the real stuff, please!)
- 1/2 cup hot coffee (secret weapon! Enhances chocolate flavor – use water if you must)
For the Peanut Butter Frosting:
- 1 cup (2 sticks) unsalted butter, softened (leave out 30-60 minutes)
- 1 cup creamy peanut butter (not natural style – too oily)
- 3 1/2 cups powdered sugar (sifted if lumpy)
- 2-4 tbsp heavy cream (start with 2, add as needed)
- 1 tsp vanilla extract
- Pinch of salt (trust me on this)
The Grand Finale:
- 6-8 fun-size Butterfinger bars, chopped (about 1 1/2 cups – I like some bigger chunks for texture)
See? Nothing too crazy! Just quality ingredients that come together to make pure magic. Now let’s get baking!
How to Make Butterfinger Cupcakes
Alright, let’s dive into the fun part – making these irresistible cupcakes! I promise it’s easier than you think. Just follow these steps, and you’ll be rewarded with the most delicious Butterfinger treats that’ll have everyone begging for the recipe.
Baking the Chocolate Cupcakes
First things first – preheat that oven to 350°F (175°C). This gives your oven time to stabilize while you prepare the batter. Line your muffin pan with those cute cupcake liners – I like the gold foil ones for extra pizzazz!
Now, grab your biggest mixing bowl and whisk together all those dry ingredients – flour, sugar, cocoa powder, baking powder, baking soda, and salt. Get them nice and combined before adding anything wet. This ensures everything distributes evenly in your cupcakes.
Next, make a well in the center and add the eggs, buttermilk, oil, and vanilla. Mix just until everything comes together – don’t go crazy with the whisk! Overmixing leads to tough cupcakes, and we want them tender and fluffy.
Here’s where the magic happens – slowly pour in that hot coffee while whisking gently. The batter will look thin and liquidy – that’s perfect! It means your cupcakes will bake up moist and tender. Fill each liner about 2/3 full (I use an ice cream scoop for perfect portions).
Bake for 16-18 minutes. You’ll know they’re done when the tops spring back lightly when touched, and a toothpick comes out with just a few moist crumbs (not wet batter!). Let them cool in the pan for 5 minutes, then transfer to a wire rack to cool completely before frosting.
Making the Peanut Butter Frosting
While those cupcakes cool, let’s whip up that dreamy peanut butter frosting. First, beat the softened butter and peanut butter together until they’re completely smooth and creamy – about 2-3 minutes on medium speed. Scrape down the bowl halfway through to make sure everything gets incorporated.
Now, gradually add the powdered sugar about 1 cup at a time, mixing on low speed at first (unless you want a powdered sugar cloud in your kitchen!). Once it’s mostly incorporated, bump up the speed to medium and beat until fluffy.
Add the vanilla and pinch of salt – this really makes the flavors pop! Then drizzle in the heavy cream 1 tablespoon at a time until you reach the perfect piping consistency. You want it smooth enough to pipe easily but stiff enough to hold its shape.
Pro tip: If your frosting gets too soft, pop it in the fridge for 15-20 minutes. Too thick? Add another splash of cream. This frosting is super forgiving!
Now comes the best part – decorating! But we’ll get to that in just a minute…
Decorating Butterfinger Cupcakes
Now for the most fun part – turning these already delicious cupcakes into absolute showstoppers! The decorating is easier than you think, but I’ve got some tricks to make them look bakery-worthy. First, make sure those cupcakes are completely cool – I know it’s tempting, but frosting warm cupcakes leads to melty disaster!
Grab your favorite piping tip – I love using a large star tip (Wilton 1M is my go-to) for those gorgeous swirls. Fill your piping bag about halfway with that luscious peanut butter frosting (less mess this way!), twist the top, and you’re ready. Hold the bag perpendicular to the cupcake, start in the center, and pipe outward in a spiral, then pull up at the end for a perfect peak. Don’t stress if your first few aren’t perfect – they’ll still taste amazing!
Here’s my golden rule: sprinkle those chopped Butterfinger pieces IMMEDIATELY after frosting each cupcake. The frosting acts like glue when it’s fresh, giving you maximum candy adhesion. I like to gently press some bigger chunks into the top too – makes for a dramatic presentation when you bite in.
Want to get fancy? Try these variations:
- Drizzle melted chocolate over the frosting before adding Butterfinger
- Press a whole mini Butterfinger bar into the top at an angle
- Alternate layers of frosting and candy pieces for a “deconstructed” look
The best part? There’s no wrong way to decorate these! Even if you just spread the frosting with a knife and dump the candy on top (we’ve all been there), they’ll still disappear fast. Just make sure to save one for yourself – these have a way of vanishing once people get a taste!
Butterfinger Cupcakes Tips for Success
After making these cupcakes more times than I can count (and eating even more!), I’ve picked up some foolproof tricks to guarantee perfect Butterfinger cupcakes every single time. These are the little things that make a big difference – trust me, your future self will thank you!
- Room temp ingredients are non-negotiable – Take your eggs, butter, and buttermilk out about an hour before baking. Cold ingredients don’t blend as smoothly, and you’ll end up with dense cupcakes instead of that perfect tender crumb we’re after.
- Resist the urge to overfill those liners – I know it’s tempting to cram in more batter, but filling them just 2/3 full prevents muffin-top disasters and ensures even baking. An ice cream scoop makes this foolproof!
- Chop those Butterfingers just right – I like a mix of fine crumbs (for even distribution) and some bigger chunks (for that satisfying crunch). Pro tip: freeze the bars for 10 minutes before chopping – less sticky mess!
- Frosting too soft? Chill it! – If your peanut butter frosting starts looking droopy after piping a few cupcakes, just pop the bowl in the fridge for 15 minutes. It’ll firm right up and hold those beautiful swirls perfectly.
- Timing is everything with the candy topping – Frost and decorate just before serving if possible. The longer the candy sits on the frosting, the softer it gets (still delicious, but loses that signature crunch).
There you have it – my hard-earned secrets for Butterfinger cupcake perfection! Follow these tips, and you’ll be the star of every potluck, birthday party, or… let’s be honest, Tuesday night Netflix binge.
Butterfinger Cupcakes Variations
Okay, let’s get creative! While the original Butterfinger cupcake recipe is absolute perfection (if I do say so myself), sometimes you want to mix things up. Here are my favorite twists that still keep that irresistible candy bar magic – because who says you can’t play with your food?
Frosting Swaps That’ll Make You Swoon
That peanut butter frosting is heavenly, but try these alternatives when you’re feeling adventurous:
- Nutella Frosting: Swap half the peanut butter for Nutella – it creates this dreamy chocolate-hazelnut situation that pairs beautifully with the Butterfinger crunch.
- Salted Caramel: Fold in 1/4 cup of thick caramel sauce into the frosting base and sprinkle with flaky sea salt for a sweet-salty knockout.
- Cookie Butter: Use Biscoff spread instead of peanut butter for a spiced, caramelized flavor that’ll have people guessing your secret ingredient.
Candy Bar Mix-Ups
Butterfingers are my first love, but these alternatives bring their own magic:
- Reese’s Pieces: Mix chopped Reese’s cups into the batter AND use them as topping for double peanut butter goodness.
- Snickers: Chopped Snickers add caramel and nougat layers that take these cupcakes to candy bar bliss.
- Twix: The shortbread crunch and caramel drizzle make an elegant twist – perfect for bridal showers!
Batter Boosters
Want to take the cupcakes themselves up a notch? Try these mix-ins:
- Banana: Mash 1 ripe banana into the batter for moist banana bread vibes (shh…it counts as fruit!).
- Espresso: Add 1 tsp instant espresso powder to the dry ingredients for deeper chocolate flavor without tasting like coffee.
- Mini Chips: Fold in 1/2 cup mini chocolate chips for extra melty pockets of chocolate.
The best part? You can mix and match these ideas! Nutella frosting with Twix pieces? Yes please! Banana batter with caramel frosting? Don’t mind if I do. Baking should be fun – so grab whatever candy bars are on sale and let your imagination run wild!
Storing Butterfinger Cupcakes
Here’s the hard truth – these cupcakes never last long in my house! But when you do need to store them (or hide them from sneaky snackers), here’s how to keep them tasting fresh and fabulous. The biggest challenge? Preserving that signature Butterfinger crunch!
The Great Storage Debate: Fridge vs. Counter
For short-term storage (1-2 days), room temperature is actually best. Keep them in an airtight container at cool room temp, and they’ll stay perfectly moist. But here’s the catch – that peanut butter frosting means they can’t sit out too long in warm kitchens. If your house is above 70°F, pop them in the fridge after the first day.
Need to keep them longer? The fridge is your friend for up to 4 days, but there’s a trick – let them come to room temp for 30 minutes before serving. Cold cupcakes are dense cupcakes, and nobody wants that!
The Crunch Conundrum
Let’s be honest – the Butterfinger pieces will lose some crunch over time as they absorb moisture from the frosting. My solution? For maximum crunch, store unfrosted cupcakes and frost/decorate just before serving. If you’ve already frosted them, a quick trick is to refresh the candy by sprinkling a few fresh pieces on top right before serving.
Can You Freeze Them?
Absolutely! Here’s my foolproof method:
- Freeze unfrosted cupcakes in a single layer, then transfer to freezer bags for up to 3 months
- Thaw at room temp, then frost fresh
- Frosting can be frozen too – just rewhip with a splash of cream to restore texture
Pro tip: Write the date on the bag – not that you’ll forget about these gems in your freezer!
Emergency Reheating Hack
Stale cupcake? Don’t despair! A 5-second zap in the microwave makes them taste fresh-baked again. Just be careful – that frosting gets melty fast! For best results, remove the candy pieces before reheating, then sprinkle fresh ones on top.
Butterfinger Cupcakes Nutritional Information
Alright, let’s talk numbers – because we all like to know what we’re biting into! Now, I’m no nutritionist (just a passionate baker who loves Butterfingers), but here’s the breakdown per cupcake based on standard ingredients. Remember – your actual numbers might dance around these estimates depending on exact brands and how generous you are with that frosting!
| Nutrition Facts | Per Cupcake |
|---|---|
| Calories | 410 |
| Total Fat | 22g |
| Saturated Fat | 9g |
| Cholesterol | 45mg |
| Sodium | 220mg |
| Total Carbohydrates | 50g |
| Dietary Fiber | 2g |
| Sugars | 38g |
| Protein | 5g |
Now, before anyone panics about the numbers – remember these are special occasion treats! And here’s my baker’s secret: the smaller you pipe that frosting swirl, the more “reasonable” the stats become (wink wink). For lighter versions, try swapping half the butter in the frosting for cream cheese or using natural sweetener blends.
Disclaimer: These estimates are calculated using generic ingredient data and standard measurements. Your actual nutritional content may vary based on specific brands, exact measurements, and any modifications you make to the recipe. When in doubt, consult a registered dietitian or nutrition calculator with your exact ingredients!
Butterfinger Cupcakes FAQs
Over the years, I’ve gotten so many questions about these cupcakes – and I love helping bakers troubleshoot! Here are the answers to the most common questions that pop up. Consider this your Butterfinger cupcake cheat sheet!
Can I use a boxed cake mix instead?
Absolutely! Sometimes we need shortcuts, and that’s okay. Use a devil’s food or chocolate fudge box mix (the kind that makes 24 cupcakes) and prepare according to package directions. The magic is really in that peanut butter frosting and Butterfinger topping anyway – nobody will know your little secret!
How can I make these without coffee?
No worries – just swap the hot coffee for an equal amount of hot water. The coffee enhances the chocolate flavor but isn’t essential. If you want extra richness, try using hot chocolate instead (use half the normal powder amount so it’s not too sweet).
What’s the best peanut butter for the frosting?
Stick with commercial creamy peanut butter (like Jif or Skippy) – the natural kind tends to separate and make frosting greasy. Don’t use reduced-fat versions either – they often add extra sugar that throws off the balance. My golden rule? If it’s the peanut butter you’d eat straight from the jar, it’ll make amazing frosting!
Can I freeze these cupcakes?
Yes! Freeze unfrosted cupcakes for up to 3 months in airtight containers. Thaw at room temp, then frost fresh. The frosting can be frozen separately too – just rewhip with a splash of cream after thawing. Pro tip: Add fresh Butterfinger pieces after thawing for maximum crunch!
How do I keep the candy from getting soggy?
This is the eternal struggle! Here are my best tricks:
- Frost and decorate just before serving whenever possible
- Store frosted cupcakes in a single layer (not stacked)
- For next-day events, sprinkle fresh Butterfinger on top right before serving
- Consider lightly coating candy pieces with melted chocolate as a moisture barrier
Remember – even if the candy softens a bit, these cupcakes still taste incredible! Now go forth and bake with confidence – you’ve got all the answers you need for Butterfinger cupcake success.
Print
Irresistible Butterfinger Cupcakes Ready in 30 Minutes
- Total Time: 1 hour
- Yield: 12 cupcakes 1x
- Diet: Vegetarian
Description
Delicious chocolate cupcakes topped with creamy peanut butter frosting and crunchy Butterfinger candy pieces.
Ingredients
- 1 1/4 cups all-purpose flour
- 1 cup granulated sugar
- 1/2 cup unsweetened cocoa powder
- 1 tsp baking powder
- 1/2 tsp baking soda
- 1/2 tsp salt
- 2 large eggs
- 1/2 cup buttermilk
- 1/3 cup vegetable oil
- 2 tsp vanilla extract
- 1/2 cup hot coffee (or hot water)
- 1 cup (2 sticks) unsalted butter, softened
- 1 cup creamy peanut butter
- 3 1/2 cups powdered sugar
- 2–4 tbsp heavy cream (as needed)
- 1 tsp vanilla extract
- Pinch of salt
- 6–8 fun-size Butterfinger bars, chopped (or 1 1/2 cups chopped Butterfinger)
Instructions
- Preheat oven to 350°F and line a 12-cup muffin pan with cupcake liners.
- In a large bowl, whisk together flour, sugar, cocoa powder, baking powder, baking soda, and salt.
- Add eggs, buttermilk, oil, and vanilla. Mix until smooth.
- Slowly whisk in the hot coffee (batter will be thin).
- Divide batter evenly into liners (about 2/3 full).
- Bake 16–18 minutes, until a toothpick comes out with a few moist crumbs. Cool completely.
- Make frosting: Beat butter + peanut butter until creamy (2–3 minutes). Add powdered sugar in batches, then beat in vanilla, salt, and heavy cream 1 tbsp at a time until fluffy and pipeable.
- Pipe frosting onto cooled cupcakes (a tall swirl looks great).
- Sprinkle with chopped Butterfinger and add a Butterfinger piece on top.
Notes
- Store covered at room temp for 1 day or refrigerate up to 4 days (bring to room temp before serving).
- Bake cupcakes 1 day ahead; frost day-of for the crunchiest topping.
- Prep Time: 25 minutes
- Cook Time: 18 minutes
- Category: Dessert
- Method: Baking
- Cuisine: American
Nutrition
- Serving Size: 1 cupcake
- Calories: 410
- Sugar: 38g
- Sodium: 220mg
- Fat: 22g
- Saturated Fat: 9g
- Unsaturated Fat: 10g
- Trans Fat: 0g
- Carbohydrates: 50g
- Fiber: 2g
- Protein: 5g
- Cholesterol: 45mg
Keywords: Butterfinger cupcakes, peanut butter frosting cupcakes, chocolate cupcakes with peanut butter frosting, candy bar cupcakes, Butterfinger dessert recipe, bake sale cupcakes