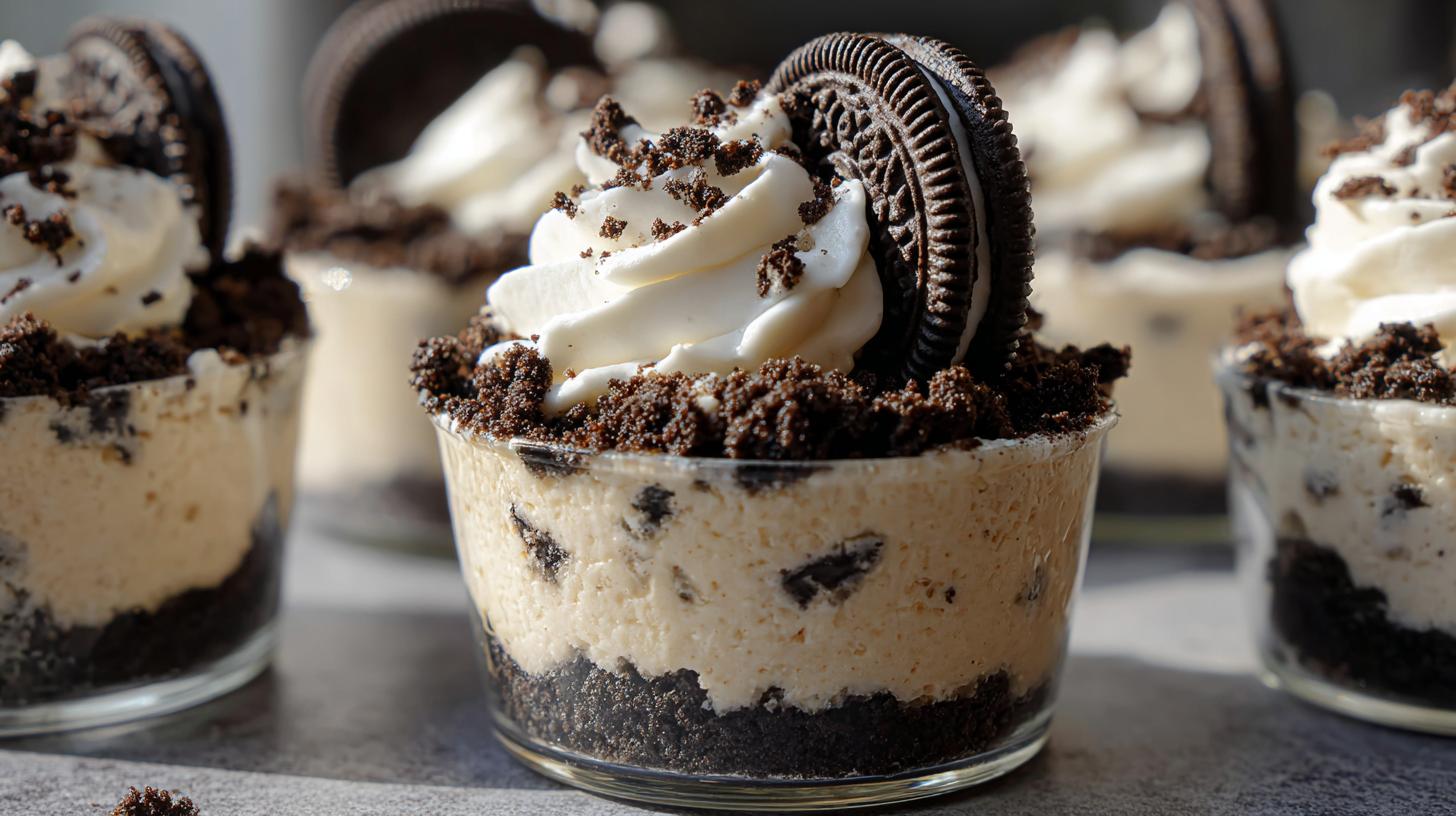
You know those days when you’re craving something sweet but don’t want to turn on the oven? That’s exactly how these easy no-bake Oreo cheesecake cups were born in my kitchen! I was hosting a last-minute girls’ night and needed a showstopper dessert that wouldn’t have me sweating over a hot stove. These little jars of joy saved the day – layers of buttery Oreo crumbs and clouds of creamy cheesecake filling that somehow taste even better than the effort you put in. My friends still beg me to make them whenever we get together, and honestly? I never say no because they’re just that simple. The best part? You probably have most of these ingredients in your kitchen right now!
Why You’ll Love These Easy No-Bake Oreo Cheesecake Cups
Let me tell you why these little cups of heaven have become my go-to dessert for every occasion (and sometimes for no occasion at all!):
- No oven required – Perfect for summer when you can’t bear to heat up the kitchen or when you’re just feeling lazy (no judgment here!)
- Ready in 20 minutes (plus chilling time) – Faster than running to the bakery when a sweet craving hits
- Foolproof to make – If you can crush cookies and stir, you’ve got this
- Dreamy creamy texture – Like biting into an Oreo-flavored cloud
- Totally customizable – I love adding extra Oreo layers or switching up toppings
- Portion-controlled perfection – No fighting over who got the biggest slice
These literally disappeared in minutes at my last potluck – I had to hide one in the fridge just so I could taste my own creation!
Ingredients for Easy No-Bake Oreo Cheesecake Cups
Grab these simple ingredients – I promise you won’t need to make a special grocery run! The magic happens with just a few pantry staples and that package of Oreos you’ve been “saving for later.” Here’s everything you’ll need:
- 20 Oreo cookies, crushed (about 2 cups crumbs) – Don’t you dare remove the cream filling!
- 5 tbsp unsalted butter, melted – I like to brown mine slightly for extra flavor
- 16 oz cream cheese, softened – Full-fat only, please – this is dessert, not a diet!
- 1/2 cup powdered sugar – Sift it if you’re feeling fancy
- 1 tsp vanilla extract – The good stuff makes all the difference
- 1 1/2 cups heavy whipping cream, cold – Straight from the fridge is key
- 12 Oreo cookies, chopped or crushed – For that perfect cookie surprise in every bite
- Whipped cream, whole Oreos, extra crumbs (optional) – Because more is more when it comes to Oreos!
See? Told you it was simple. Now let’s turn these basic ingredients into something magical!
How to Make Easy No-Bake Oreo Cheesecake Cups
Okay, let’s get to the fun part – turning those simple ingredients into the most irresistible dessert cups you’ve ever tasted! I’ve made these so many times I could probably do it in my sleep, but I’ll walk you through each step like I’m right there in the kitchen with you.
Step 1: Prepare the Oreo Crust
First, grab those Oreos and get ready to release some stress! I like to toss them in a ziplock bag and crush them with a rolling pin (therapeutic, right?). Mix the crumbs with melted butter until it looks like wet sand. Now here’s my trick – use the bottom of a glass to really press the mixture firmly into your cups or jars. This prevents crumbly disasters later! Pop them in the fridge while you work on the filling – this helps the crust set up nicely.
Step 2: Whip the Cream
This is where cold is your best friend! Make sure your bowl and beaters are chilled too if possible. Whip that heavy cream on medium-high until you get beautiful stiff peaks that hold their shape when you lift the beaters. Pro tip: If your kitchen’s warm, place the bowl over ice while whipping. Overwhipped cream turns grainy, so stop as soon as it’s billowy and perfect!
Step 3: Mix the Cheesecake Filling
In another bowl, beat the softened cream cheese until it’s completely smooth – no lumps allowed! Add the powdered sugar and vanilla, scraping down the sides as you go. I always taste test here (quality control!) and sometimes add an extra splash of vanilla if I’m feeling extra. The mixture should be silky and slightly fluffy.
Step 4: Fold and Assemble
Now for the magic! Gently fold the whipped cream into the cream cheese mixture in thirds – this keeps it light and airy. Then fold in those chopped Oreos (I like some big chunks for texture). Spoon or pipe the filling over your chilled crusts. Want to get fancy? Add another thin layer of Oreo crumbs in the middle for extra crunch!
Step 5: Chill and Serve
Here’s the hardest part – waiting! These need at least 4 hours in the fridge (overnight is even better) to set properly. Right before serving, I top them with whipped cream, a sprinkle of Oreo crumbs, and sometimes a whole cookie perched on top. The first spoonful through all those layers? Absolute bliss!
Tips for Perfect Easy No-Bake Oreo Cheesecake Cups
After making these cheesecake cups more times than I can count, here are my best tricks to guarantee perfect results every single time:
- Use brick-style cream cheese – That tub stuff? Won’t set right. Full-fat Philadelphia is my secret weapon for that perfect creamy texture.
- Chill your mixing bowl – 10 minutes in the freezer makes whipping the cream foolproof. Cold = stiff peaks every time!
- Press that crust HARD – I use a shot glass to really compact the Oreo layer so it doesn’t crumble when you dig in.
- Fold gently – Overmixing deflates your beautiful whipped cream. Slow, sweeping motions keep it light and fluffy.
- Make ahead magic – These actually taste better after 24 hours in the fridge as the flavors meld. Just add toppings right before serving.
- Storage smarts – Keep them covered in the fridge for up to 3 days (if they last that long!). The crust stays crunchiest in individual airtight containers.
Trust me – once you’ve tried these little tricks, your Oreo cheesecake cups will be next-level amazing!
Variations for Easy No-Bake Oreo Cheesecake Cups
Oh, the possibilities! Once you’ve mastered the basic recipe, it’s time to play. Here are my favorite ways to mix up these cheesecake cups when I’m feeling creative (or when my pantry demands it):
- Mint Chocolate Magic – Swap in mint Oreos and add a drop of peppermint extract to the filling. Top with chocolate shavings for a Girl Scout cookie vibe!
- Salted Caramel Swirl – Layer in store-bought caramel sauce (I warm it slightly first) and finish with flaky sea salt. The sweet-salty combo is insane.
- Peanut Butter Lover’s – Mix 1/4 cup peanut butter into the filling and use peanut butter Oreos if you can find them. Reese’s pieces make the perfect garnish.
- Berry Bliss – Alternate layers of cheesecake with fresh raspberry puree or strawberry jam. The tart fruit cuts through the richness beautifully.
- Cookies & Cream Explosion – Crumble different sandwich cookies (like Nutter Butters or Golden Oreos) between layers for a surprise in every bite.
The best part? No matter what variation you try, it’s still that same easy no-bake method we love!
Serving Suggestions
These Oreo cheesecake cups are stars on their own, but here’s how I love to serve them for maximum wow factor! A steaming cup of dark roast coffee cuts through the sweetness perfectly – my book club girls go wild for this combo. For kids (or kids-at-heart), ice-cold milk is non-negotiable. Sometimes I’ll arrange fresh raspberries on the side for a pop of color and tartness. Pro tip: Set them out 10 minutes before serving – that slight softening makes the texture even dreamier!
Storage & Reheating
Here’s the scoop on keeping your Oreo cheesecake cups at their best (if you somehow have leftovers!). They’ll stay perfect in the fridge for up to 3 days – just cover them tightly so they don’t absorb other flavors. I don’t recommend freezing them though – the texture goes all weird and grainy. Trust me, I learned that lesson the hard way after a freezer experiment gone wrong! If you need to make them ahead, just whip up the components separately and assemble the day you’re serving.
Nutritional Information
Okay, let’s be real – we’re not eating Oreo cheesecake cups for their health benefits! But for those who like to know, here’s the nutritional breakdown per serving (based on my exact ingredients). Remember – these numbers can vary depending on your brands and how generous you are with toppings! Each creamy cup packs about 520 calories with that perfect balance of sweet cookie crunch and velvety filling. They’ve got 6g protein to (sort of) balance out the 32g sugar – I call that a win! Store-bought versions often have way more preservatives, so homemade is always the better choice.
FAQs About Easy No-Bake Oreo Cheesecake Cups
I get asked these questions all the time when I bring my Oreo cheesecake cups to parties – let me save you the trouble of wondering!
Can I use low-fat cream cheese?
Sweetie, I know we all want to pretend desserts are healthy, but trust me – stick with full-fat cream cheese here. The low-fat stuff makes the filling weepy and sad. That rich, creamy texture? That’s the butterfat working its magic!
How long do they need to chill?
Four hours minimum, but overnight is golden. I know it’s torture waiting, but the filling needs time to set up properly. Think of it like beauty sleep for your dessert!
Can I make these ahead?
Absolutely! In fact, they taste even better on day two. Just hold off on the whipped cream topping until serving so it stays fluffy. My secret? I always make a double batch – they disappear fast!
What if my whipped cream won’t stiffen?
Been there! Make sure everything’s ice-cold (bowl, beaters, cream). If it’s still not cooperating, add 1 tbsp powdered sugar while whipping – the stabilizer helps. And never try to whip cream on a humid day (learned that the hard way!).
Can I use different cookies?
Get creative! Golden Oreos make a fun vanilla version, and mint Oreos are holiday magic. Just keep the butter ratio the same for the crust. My neighbor swears by using Biscoff cookies – I might need to steal that idea!
Share Your Easy No-Bake Oreo Cheesecake Cups
Now I want to see your creations! Did you add a fun twist to these Oreo cheesecake cups? Maybe you discovered the perfect cookie-to-filling ratio? Drop a comment below – I read every single one and love swapping tips. Tag me on Instagram @[YourHandle] if you share photos (I’ll probably beg for the recipe again!). These little cups have brought so much joy to my kitchen, and I can’t wait to hear how they turn out in yours!
Print
5 Irresistible Easy No-Bake Oreo Cheesecake Cups You Need Now
- Total Time: 4 hours 20 minutes
- Yield: 6 servings 1x
- Diet: Vegetarian
Description
Easy no-bake Oreo cheesecake cups are a simple and delicious dessert with layers of Oreo crust and creamy cheesecake filling.
Ingredients
- 20 Oreo cookies, crushed (about 2 cups crumbs)
- 5 tbsp unsalted butter, melted
- 16 oz cream cheese, softened
- 1/2 cup powdered sugar
- 1 tsp vanilla extract
- 1 1/2 cups heavy whipping cream, cold
- 12 Oreo cookies, chopped or crushed (for mixing in)
- Whipped cream (optional)
- Oreo cookies (whole or halved, optional)
- Extra Oreo crumbs (optional)
Instructions
- Make the crust: Stir crushed Oreos and melted butter until evenly moistened. Spoon 2–3 tablespoons into the bottom of each small jar or dessert cup and press down. Chill while you make the filling.
- Whip the cream: In a mixing bowl, beat cold heavy cream until stiff peaks form. Set aside.
- Mix the cheesecake base: In a separate bowl, beat cream cheese, powdered sugar, and vanilla until smooth and creamy.
- Fold it together: Gently fold whipped cream into the cream cheese mixture until fluffy. Fold in chopped/crushed Oreos.
- Assemble: Spoon or pipe the filling over the Oreo crust (add a second crust layer if you want extra crunch).
- Chill: Refrigerate at least 4 hours (or overnight) until set.
- Top & serve: Finish with whipped cream, Oreo crumbs, and a cookie on top.
Notes
- For best results, use full-fat cream cheese.
- Ensure the whipping cream is cold for stiff peaks.
- Customize with extra Oreo layers if desired.
- Store leftovers in the refrigerator for up to 3 days.
- Prep Time: 20 minutes
- Cook Time: 0 minutes
- Category: Dessert
- Method: No-Bake
- Cuisine: American
Nutrition
- Serving Size: 1 cup
- Calories: 520
- Sugar: 32g
- Sodium: 280mg
- Fat: 38g
- Saturated Fat: 20g
- Unsaturated Fat: 15g
- Trans Fat: 0.5g
- Carbohydrates: 45g
- Fiber: 1g
- Protein: 6g
- Cholesterol: 90mg
Keywords: easy no-bake oreo cheesecake cups, oreo cheesecake jars, cookies and cream cheesecake, no bake oreo dessert, mini cheesecake cups, oreo dessert cups