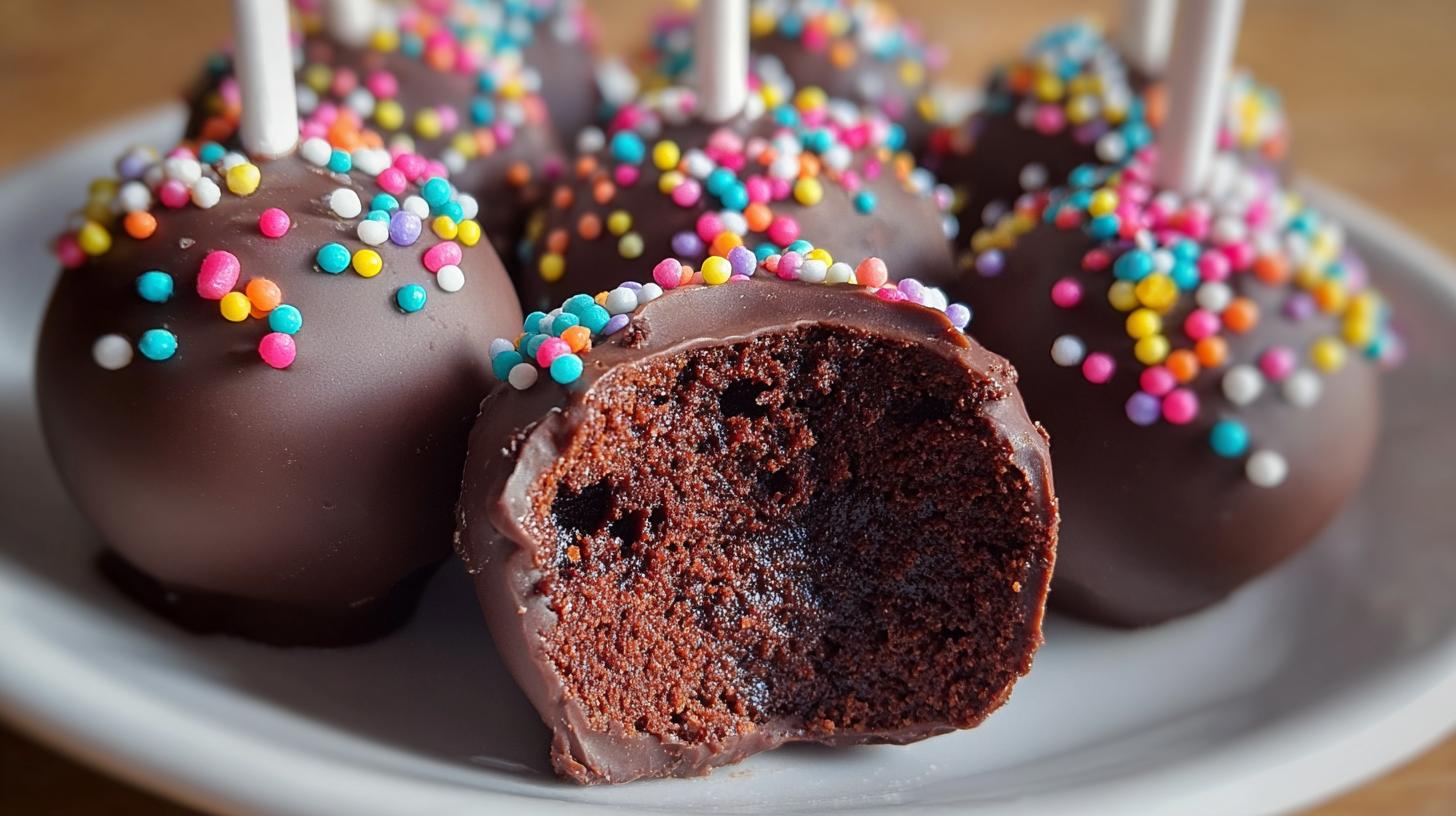
There’s something magical about chocolate brownie cake pops that makes them the star of any party. I first made these for my niece’s birthday, and let me tell you—they disappeared faster than the wrapping paper! Imagine rich, fudgy brownies rolled into bite-sized balls, dipped in creamy chocolate, and showered with rainbow sprinkles. They’re the perfect combo of chewy and crunchy, plus they look adorable standing tall on their little sticks. The best part? They’re surprisingly easy to make, even if you’re not a baking pro. Whether it’s a kids’ party or a fancy dessert table, these chocolate brownie cake pops always steal the show.
Why You’ll Love These Chocolate Brownie Cake Pops
Let me count the ways these little treats will become your new go-to dessert:
- Quick to make – Unlike fussy desserts, these chocolate brownie cake pops come together fast (even with baking time!)
- Party perfect – They look fancy but are totally approachable – great for birthdays, showers, or just because
- Kid-approved – What child (or adult!) can resist chocolate-dipped brownie balls with sprinkles?
- Endlessly customizable – Swap sprinkles for crushed nuts, coconut, or drizzle with white chocolate
- Portable perfection – No plates or forks needed – just grab and go!
Trust me, once you make these chocolate brownie cake pops, you’ll understand why I always have the ingredients on hand!
Ingredients for Chocolate Brownie Cake Pops
Here’s everything you’ll need to make these irresistible treats – I promise it’s all simple pantry staples!
- For the brownie base:
- 1/2 cup (1 stick) unsalted butter, melted and slightly cooled
- 1 cup granulated sugar
- 2 large eggs, at room temperature
- 1 tsp pure vanilla extract (the good stuff makes a difference!)
- 1/2 cup unsweetened cocoa powder (I prefer Dutch-processed for richer flavor)
- 1/2 cup all-purpose flour (spooned and leveled)
- 1/4 tsp fine sea salt
- 1/2 cup chocolate chips (optional but oh-so-good for extra fudginess)
- For binding:
- 2-3 Tbsp chocolate frosting (homemade or store-bought – no judgment here!)
- For coating & decorating:
- 12 oz milk chocolate or semisweet chocolate melting wafers (or high-quality chopped chocolate)
- 1 Tbsp coconut oil or vegetable shortening (helps thin the chocolate for smooth dipping)
- Rainbow sprinkles (or your favorite toppings – crushed peppermint is amazing at Christmas!)
- 12-16 lollipop sticks (the 4-inch ones work perfectly)
Pro tip: Measure everything before starting – it makes the process so much smoother when you’re not scrambling for ingredients mid-bake!
Equipment You’ll Need
Gather these trusty tools – you probably have most already!
- 8×8-inch baking pan (my trusty Pyrex works perfectly)
- Parchment paper (lifesaver for easy brownie removal)
- Mixing bowls (one large, one medium)
- Whisk and rubber spatula
- Lollipop sticks (I buy the 4-inch ones in bulk)
- Foam block or tall cup filled with rice (for drying pops upright)
That’s it! No fancy gadgets needed for these chocolate brownie cake pops.
How to Make Chocolate Brownie Cake Pops
Alright, let’s get to the fun part – turning simple ingredients into those irresistible chocolate brownie cake pops! I’ll walk you through each step, just like I’m right there in the kitchen with you. Don’t worry if you’re new to this – my first batch was far from perfect, but they still tasted amazing!
Bake the Brownie Base
First, let’s make the heart of our cake pops – that rich, fudgy brownie layer. Preheat your oven to 350°F and line your 8×8-inch pan with parchment paper (trust me, this makes cleanup a breeze). In a large bowl, whisk together the melted butter and sugar until they’re all cozy together. Add the eggs one at a time, whisking well after each, then stir in that lovely vanilla extract.
Now for the dry ingredients – gently mix in the cocoa powder, flour, and salt just until combined. Overmixing is the enemy of fudgy brownies! If you’re using chocolate chips (which I highly recommend), fold them in now. Spread the batter evenly in your prepared pan and bake for 20-25 minutes. You’ll know they’re done when the edges look set but the center still has a slight jiggle. Let them cool completely in the pan – I know it’s tempting, but diving in too early means crumbly disaster when forming our cake pops!
Shape and Chill the Brownie Balls
Time to get hands-on! Crumble your cooled brownies into a large bowl – you want fine crumbs, but don’t pulverize them into dust. Add 2 tablespoons of chocolate frosting and mix gently with your hands or a fork. The mixture should hold together when pressed – if it’s too dry, add another tablespoon of frosting, but be careful not to overdo it or your pops will be too soft.
Now for the fun part – rolling! Scoop about 2 tablespoons of mixture and roll into 1½-inch balls between your palms. Place them on a parchment-lined tray as you go. Here’s my secret: chill these beauties for at least 30 minutes in the fridge (or 10-15 minutes in the freezer if you’re in a hurry). This step is crucial – cold brownie balls hold their shape when we dip them later!
Dip and Decorate the Cake Pops
Let’s make these pops shine! First, melt a small amount of chocolate (about ¼ cup) in a microwave-safe bowl. Dip the tip of each lollipop stick about ½ inch into the melted chocolate, then insert it halfway into a chilled brownie ball. This “glues” the stick in place – no toppled pops! Chill for 10 more minutes to set.
Meanwhile, melt the remaining chocolate (adding coconut oil if you want a smoother consistency). Now the magic happens! Holding a pop by the stick, dip it into the melted chocolate, swirling gently to coat completely. Lift straight up and gently tap your wrist to remove excess chocolate – this prevents those dreaded chocolate puddles at the base. Immediately add sprinkles (they won’t stick once the chocolate sets!) and stand the pop upright in a foam block or cup filled with rice to dry. Repeat with all pops, working quickly but carefully.
Pro tip: If your kitchen is warm, pop the finished cake pops in the fridge for 5 minutes to set completely. Then step back and admire your handiwork – you’ve just created the most adorable chocolate brownie cake pops!
Tips for Perfect Chocolate Brownie Cake Pops
I’ve made my share of chocolate brownie cake pops over the years, and these are the little secrets that’ll save you from common disasters:
- Chocolate matters – Spend a little extra on good melting wafers (I love Ghirardelli) – cheap chocolate seizes up and makes dipping a nightmare
- Chill like you mean it – Those brownie balls must be cold! Room temp = crumbly mess in your chocolate coating
- Tap it out – After dipping, gently tap your wrist to shake off excess chocolate – this prevents those weird drippy bottoms
- Sprinkle fast – Toss on those sprinkles immediately after dipping – the chocolate sets quicker than you’d think
- Fix cracks – See a hairline crack? Just dab on a bit more melted chocolate with a toothpick – no one will know!
Remember, even the “ugly” ones taste amazing – that’s the beauty of chocolate brownie cake pops!
Variations and Substitutions
One of my favorite things about chocolate brownie cake pops is how easily you can mix them up! Here are some delicious twists I’ve tried over the years – feel free to get creative with your own ideas too.
Dietary Swaps
Need to adjust for allergies or preferences? No problem!
- Gluten-free: Swap the all-purpose flour for your favorite 1:1 gluten-free blend (I’ve had great results with Bob’s Red Mill)
- Dairy-free: Use vegan butter and dairy-free chocolate chips – the brownies will still be wonderfully fudgy
- Egg-free: Try flax eggs (1 Tbsp ground flax + 3 Tbsp water per egg) – the texture changes slightly but still works
Flavor Twists
Sometimes I like to play with the basic recipe – here are my favorite flavor boosters:
- Mint chocolate: Add 1/4 tsp peppermint extract to the brownie batter and use dark chocolate coating
- Peanut butter lovers: Mix 2 Tbsp peanut butter into the frosting before binding the crumbs
- Cookies and cream: Roll the dipped pops in crushed Oreo crumbs instead of sprinkles
- Spiced: Add 1/2 tsp cinnamon and a pinch of cayenne to the dry ingredients for a Mexican chocolate vibe
Coating Ideas
The chocolate dip is classic, but don’t stop there!
- White chocolate: Gorgeous contrast with the dark brownie center
- Colored candy melts: Perfect for themed parties (pink for baby showers, orange for Halloween)
- Crunchy toppings: Try crushed nuts, toasted coconut, or even crushed pretzels for salty-sweet goodness
See? Chocolate brownie cake pops are like a blank canvas for your dessert creativity. The only limit is your imagination (and maybe how many sprinkles you can fit in your pantry)!
Storing and Serving Chocolate Brownie Cake Pops
Now that you’ve created these adorable chocolate brownie cake pops, let’s talk about keeping them fresh and serving them like a pro! Here’s what I’ve learned from years of making (and devouring) them:
Storage is simple – just pop them in an airtight container with some parchment between layers to prevent sticking. They’ll keep beautifully in the fridge for up to 3 days. Want to prep ahead? You can freeze the undipped brownie balls for a month (thaw in the fridge before coating).
When it’s party time, take them out of the fridge about 15 minutes before serving. Room temperature lets all those chocolate flavors shine! If you’re transporting them, stick the pops upright in a foam block or tall cup filled with rice (my grandma’s trick) to prevent smudging.
These make the cutest edible gifts! I’ve packaged them in clear cellophane bags tied with ribbon for birthdays, tucked them into mason jars for teacher appreciation, and even arranged them in a bouquet-style display for bridal showers. Pro tip: include a little note about keeping them refrigerated until serving – your recipients will thank you!
One warning though – these chocolate brownie cake pops tend to disappear fast once they hit the table. I learned that the hard way when my nephew snuck three before dinner at our last family gathering!
Nutritional Information
Now, I know we’re not eating chocolate brownie cake pops for their health benefits (hello, dessert!), but here’s the scoop on what you’re enjoying – because knowledge is power, right? Each delightful pop contains approximately:
- Calories: 220
- Sugar: 18g
- Sodium: 60mg
- Fat: 12g (7g saturated, 4g unsaturated)
- Carbohydrates: 28g
- Fiber: 2g
- Protein: 3g
- Cholesterol: 45mg
Remember, nutrition may vary based on ingredients used – like if you add extra chocolate chips (no judgment!) or swap in different toppings. I always say one of these chocolate brownie cake pops is the perfect little indulgence – enough to satisfy your sweet tooth without going overboard. Everything in moderation, right? Even moderation!
Frequently Asked Questions
Over the years, I’ve gotten so many questions about these chocolate brownie cake pops – here are the ones that come up most often with my tried-and-true answers!
Q1. Can I use boxed brownie mix instead of homemade?
Absolutely! I won’t tell anyone. Just prepare the mix according to package directions (usually in an 8×8 pan), let it cool completely, then proceed with crumbling and shaping. The texture might be slightly different, but they’ll still make delicious cake pops!
Q2. Help! My chocolate coating cracked – how do I fix it?
Don’t panic – this happens to me sometimes too! Those little cracks usually form if the brownie balls were too cold when dipped. Just dab some extra melted chocolate over the cracks with a toothpick. For future batches, let the chilled balls sit at room temp for 2-3 minutes before dipping.
Q3. What’s the easiest way to melt chocolate for dipping?
I swear by the microwave method – 30 second bursts at 50% power, stirring between each. This prevents scorching. If you’re making lots of chocolate brownie cake pops, a small slow cooker on “warm” works wonders for keeping chocolate at the perfect dipping consistency.
Q4. Can I make these without lollipop sticks?
Of course! Just skip the sticks and make them as truffles instead. Roll smaller balls (about 1-inch), dip with a fork, and set them on parchment to dry. They’re just as tasty – maybe even more elegant for fancy parties!
Q5. Why are my cake pops falling off the sticks?
Ah, the dreaded droop! This usually happens if: 1) The brownie balls weren’t chilled enough before dipping, or 2) You didn’t “glue” the stick with that initial chocolate dip. Next time, make sure your balls are fridge-cold and always secure the sticks with melted chocolate first.
Got more questions about these chocolate brownie cake pops? Drop them in the comments – I’m happy to help troubleshoot your baking adventures!
Print
Irresistible Chocolate Brownie Cake Pops Your Kids Will Devour
- Total Time: 1 hour 20 minutes
- Yield: 12 pops 1x
- Diet: Vegetarian
Description
Decadent chocolate brownie cake pops dipped in chocolate and topped with colorful sprinkles, perfect for parties and celebrations.
Ingredients
- 1/2 cup (1 stick) unsalted butter
- 1 cup granulated sugar
- 2 large eggs
- 1 tsp vanilla extract
- 1/2 cup unsweetened cocoa powder
- 1/2 cup all-purpose flour
- 1/4 tsp salt
- 1/2 cup chocolate chips (optional, for extra fudgy texture)
- 2–3 Tbsp chocolate frosting (store-bought or homemade)
- 12 oz milk chocolate or semisweet chocolate melting wafers (or chopped chocolate)
- 1 Tbsp coconut oil or vegetable shortening (optional, for a smoother dip)
- Rainbow sprinkles
- 12–16 lollipop sticks
Instructions
- Preheat oven to 350°F. Line an 8×8-inch pan with parchment.
- Melt butter, whisk in sugar, then whisk in eggs and vanilla.
- Stir in cocoa powder, flour, and salt just until combined. Fold in chocolate chips if using.
- Spread into pan and bake 20–25 minutes (center should be set but still fudgy). Cool completely.
- Crumble cooled brownies into fine crumbs in a large bowl. Add 2 Tbsp frosting and mix until the crumbs hold together when pressed. Add 1 more Tbsp only if needed.
- Scoop and roll into 1 1/2-inch balls (about 2 Tbsp each). Place on a parchment-lined tray and chill 30 minutes (or freeze 10–15 minutes) until firm.
- Melt a small amount of chocolate. Dip the tip of each lollipop stick into melted chocolate, then insert halfway into each brownie ball. Chill 10 minutes to set.
- Melt remaining chocolate (stir in coconut oil if using). Dip each pop, gently tapping off excess. Immediately top with rainbow sprinkles.
- Stand pops upright in a foam block/cup filled with rice or lay on parchment. Let set until chocolate is firm.
Notes
- Use high-quality chocolate for the best results.
- Chilling the brownie balls helps them hold their shape when dipping.
- If the chocolate is too thick, add a little coconut oil to thin it.
- Store cake pops in an airtight container in the fridge for up to 3 days.
- Prep Time: 35 minutes
- Cook Time: 25 minutes
- Category: Dessert
- Method: Baking, Dipping
- Cuisine: American
Nutrition
- Serving Size: 1 pop
- Calories: 220
- Sugar: 18g
- Sodium: 60mg
- Fat: 12g
- Saturated Fat: 7g
- Unsaturated Fat: 4g
- Trans Fat: 0g
- Carbohydrates: 28g
- Fiber: 2g
- Protein: 3g
- Cholesterol: 45mg
Keywords: chocolate brownie cake pops, brownie pops recipe, easy cake pops, chocolate dipped desserts, birthday party desserts, sprinkle cake pops