Picture this: It’s a sweltering summer afternoon, and you need a dessert that won’t heat up your kitchen but still wows your guests. That’s where these Mini Key Lime Cheesecakes come in—cool, creamy, and bursting with tangy-sweet flavor, all without turning on the oven. I first made these for a backyard potluck, and let me tell you, they vanished faster than the ice in the lemonade pitcher. Now, they’re my go-to for any summer gathering, bridal shower, or just when I need a little sunshine in a bite. The best part? They’re ridiculously easy to whip up, and those individual servings mean no messy slicing—just pure, zesty delight.
Why You’ll Love These Mini Key Lime Cheesecakes
Trust me, these little bites of sunshine will steal the show at your next gathering—here’s why:
- No-bake magic: Skip the oven! These set beautifully in the fridge, keeping your kitchen cool on hot days.
- Zingy lime bliss: That tart-sweet kick from fresh lime juice and zest? Pure summer in every bite.
- Individual cuteness: No slicing drama—just grab-and-go portions (and no fighting over who got the bigger piece!).
- Crowd-pleaser: Creamy, light, and not too heavy—even non-dessert people sneak seconds.
- Make-ahead win: Whip them up in 20 minutes, then let the fridge do the rest while you relax.
See? Told ya they’re special. Now let’s get mixing!
Ingredients for Mini Key Lime Cheesecakes
Gather these simple ingredients—I promise, nothing fussy here! The magic happens when ordinary things like cream cheese and graham crackers meet bright, zippy lime. Just a heads-up: softened cream cheese is non-negotiable unless you enjoy lumpy batter fights with your mixer. (Been there!)
For the crust:
- 1½ cups graham cracker crumbs (about 10 whole sheets, crushed fine—or cheat with pre-crushed like I sometimes do)
- 6 tablespoons melted butter (salted or unsalted both work, but salted gives that sweet-salty punch I love)
- 2 tablespoons granulated sugar (this tiny bit makes the crust just sweet enough without overpowering the lime)
For the filling:
- 16 oz cream cheese, softened (leave it out for 30 minutes—no shortcuts here!)
- ½ cup granulated sugar (trust me, this is the perfect amount to balance the tart lime)
- ¼ cup sour cream (the secret weapon for that velvety texture)
- ⅓ cup key lime juice (fresh-squeezed if you can find key limes, but regular lime juice works in a pinch)
- 1 tablespoon lime zest (pack it in—this is where the big flavor lives!)
- 1 teaspoon vanilla extract (pure, please—imitation vanilla and I aren’t on speaking terms)
- 1 cup whipped cream (cool whip works, but homemade takes it over the top)
For garnish:
- Extra whipped cream (because more is always better)
- Lime slices (thin ones look so pretty—use a mandoline if you have one)
Equipment You’ll Need
Don’t worry—you probably already have most of this in your kitchen! Here’s what you’ll need to whip up these mini delights:
- Standard 12-cup muffin tin (or mini cheesecake pan if you’re fancy)
- Paper or foil liners (the pretty floral ones make me feel like a pastry chef)
- Mixing bowls (one big one for filling, one smaller for crust)
- Electric mixer (handheld works great—no stand mixer required!)
- Spatula (for scraping every last bit of that creamy filling)
- Measuring cups/spoons (because eyeballing lime juice never ends well)
That’s it! Now let’s get to the fun part—making magic happen.
How to Make Mini Key Lime Cheesecakes
Alright, let’s dive into the fun part! These mini cheesecakes come together in three simple steps—just don’t skip the chilling times (I learned that the hard way with a runny cheesecake disaster back in 2017). Here’s how to nail it:
Step 1: Prepare the Graham Cracker Crust
First, grab that bowl of graham cracker crumbs, melted butter, and sugar. Mix them until it looks like wet sand—you want every crumb coated so the crust holds together. Now, line your muffin tin with those cute liners (pro tip: spray them lightly with cooking spray for easier peeling later).
Scoop about 1½ tablespoons into each cup, then press it down firmly with the back of a spoon or small glass. Really pack it in! Pop the whole tray in the fridge for at least 10 minutes while you make the filling. This chill time is crucial—it keeps the crust from crumbling when you add the creamy topping.
Step 2: Make the Key Lime Cheesecake Filling
Time for the star of the show! Beat the softened cream cheese and sugar together until it’s completely smooth—no lumps allowed. Scrape down the bowl often (those sneaky cream cheese lumps hide in the corners).
Mix in the sour cream, lime juice, zest, and vanilla. The smell alone will make your mouth water! Now, gently fold in the whipped cream with a spatula. Don’t whisk or beat it—slow, sweeping motions keep the filling light and airy. You’ll know it’s ready when no white streaks remain.
Step 3: Assemble and Chill
Pull your chilled crusts from the fridge and dollop the filling evenly into each cup, smoothing the tops with a knife or offset spatula. Fill them nearly to the top—they won’t rise like baked cheesecakes.
Here’s the hard part: walk away! Chill them for at least 3 hours (overnight is even better). The wait is torture, but it’s what transforms that creamy mixture into perfect, sliceable bites. Right before serving, top with extra whipped cream and a lime slice for that picture-perfect finish.
Tips for Perfect Mini Key Lime Cheesecakes
After making these dozens of times (and yes, a few flops along the way), here are my can’t-skip secrets for mini cheesecake success:
- Juice those limes fresh: Bottled juice just doesn’t give that bright, punchy flavor. Roll limes on the counter first to get every last drop!
- Fold, don’t beat: When adding whipped cream, gentle folds keep the filling light and fluffy—overmixing turns it dense.
- Patience is key: That 3-hour chill is the minimum. Overnight? Absolute perfection—the texture becomes dreamily firm yet creamy.
- Room temp cream cheese: Cold cream cheese = lump city. Let it soften fully for silky-smooth filling.
Follow these, and you’ll get rave reviews—my book club still talks about that batch I brought last summer!
Variations and Substitutions
Want to mix things up? Here are my favorite twists—some tested, some borrowed from friends who begged for the recipe:
- Lemon lovers: Swap lime juice for lemon (same amount) and add a teaspoon of zest. Instant sunshine!
- Gluten-free: Use crushed gluten-free grahams or even almond flour mixed with butter for the crust.
- Dairy-free: Coconut whipped cream and vegan cream cheese work surprisingly well—just add an extra tablespoon of lime juice to balance the sweetness.
- Berry boost: Top with fresh raspberries or a quick strawberry sauce for a pretty contrast.
One warning: Don’t skip the sour cream—it’s the texture MVP. And bottled lime juice? Just… don’t. Your taste buds will thank me.
Serving and Storing Mini Key Lime Cheesecakes
Right before serving, I love adding a dollop of fresh whipped cream and a thin lime slice on top—it makes them look as gorgeous as they taste! These little guys keep beautifully in an airtight container in the fridge for up to 3 days (if they last that long). For longer storage, pop them in the freezer—just thaw in the fridge overnight when that citrus craving hits. Pro tip: Freeze them uncovered first for an hour, then wrap individually to prevent ice crystals. That way, you’ve always got a sunny little dessert ready to brighten your day!
Mini Key Lime Cheesecakes FAQs
I get asked these questions all the time when I bring these to parties—here’s the scoop:
Can I use regular limes instead of key limes?
Absolutely! Regular limes work just fine—they’re a bit less tart than key limes, so add an extra teaspoon of zest if you want that bold citrus punch. I’ve used both depending on what’s at the store, and honestly? Most people can’t tell the difference once it’s all mixed into that creamy filling.
How long do these mini cheesecakes last in the fridge?
They’ll stay perfect for 3 days if you keep them covered (if they last that long!). The crust might soften slightly by day 3, but the flavor actually gets better as the lime mellows. Pro tip: Wait to add whipped cream toppings until just before serving.
Can I freeze them?
Yes! Freeze uncovered for an hour first to set the tops, then wrap individually in plastic. They’ll keep for up to a month. Thaw overnight in the fridge—no microwave unless you want cheesecake soup (learned that one the hard way).
Why did my filling turn out runny?
Oh honey, I’ve been there! Usually it’s one of three things: cream cheese wasn’t fully softened, you skipped the full chilling time, or the whipped cream was under-whipped. Next time, make sure your cream cheese is room temp (I leave mine out for a full hour) and chill overnight for foolproof results.
Nutritional Information
Just a quick note—nutrition can vary based on your specific ingredients, but here’s the general scoop per mini cheesecake: about 290 calories, 18g fat (10g saturated), and 20g sugar. Not bad for a little slice of sunshine, right?
Share Your Mini Cheesecake Creations
Did you make these sunny little bites? I’d love to see them! Snap a pic and tag me—or leave a comment below telling me how they turned out. Did you add any fun twists? (Confession: Your rave reviews are my favorite kitchen fuel!)
Print
Irresistible Mini Key Lime Cheesecakes in Just 20 Minutes
- Total Time: 3 hours 20 minutes
- Yield: 12 mini cheesecakes 1x
- Diet: Vegetarian
Description
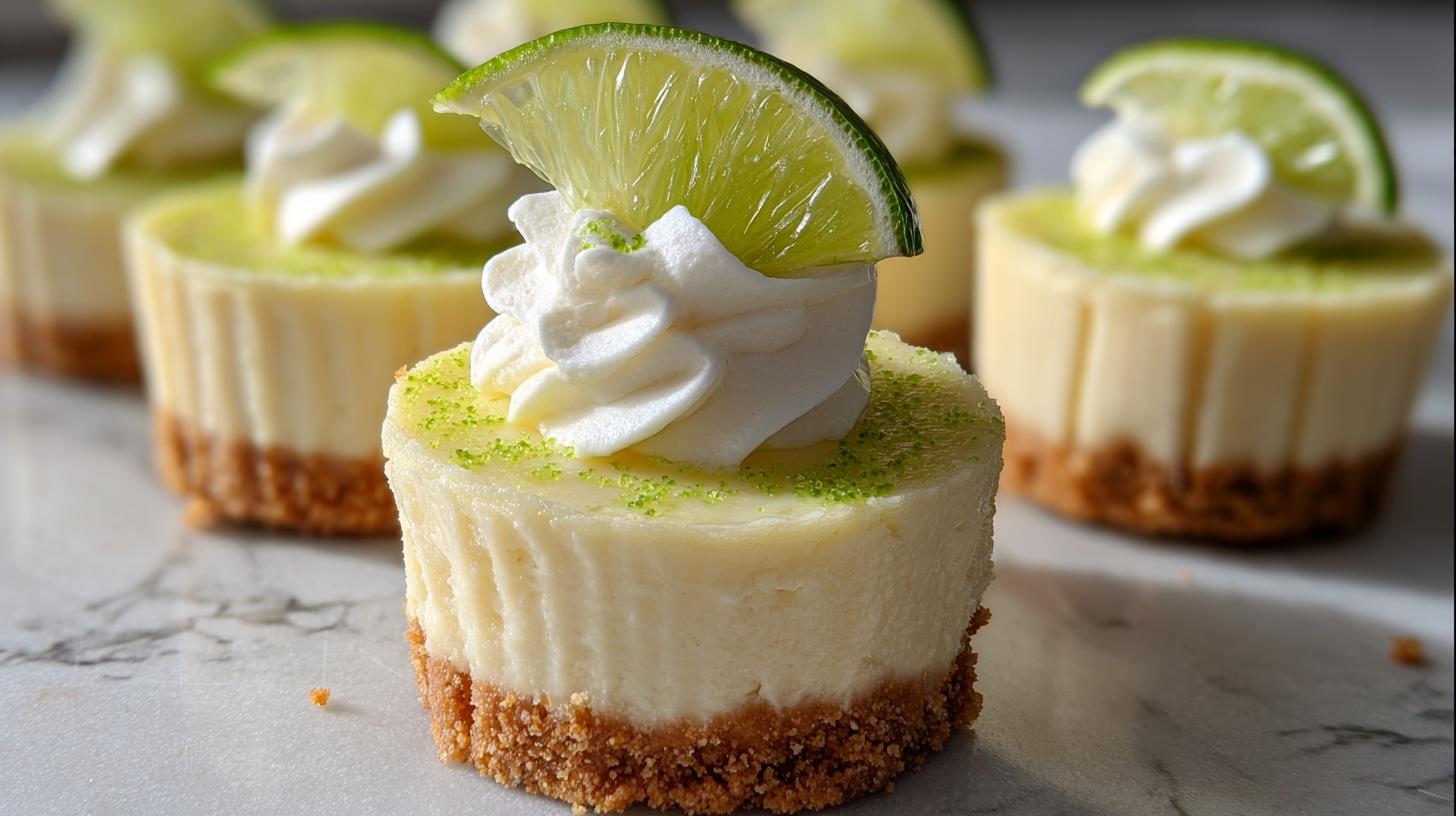
Mini Key Lime Cheesecakes are a refreshing and easy no-bake dessert. These individual cheesecakes feature a graham cracker crust and a creamy lime filling.
Ingredients
- 1½ cups graham cracker crumbs
- 6 tablespoons melted butter
- 2 tablespoons granulated sugar
- 16 oz cream cheese, softened
- ½ cup granulated sugar
- ¼ cup sour cream
- ⅓ cup key lime juice (or fresh lime juice)
- 1 tablespoon lime zest
- 1 teaspoon vanilla extract
- 1 cup whipped cream (plus extra for topping)
- Lime slices, for garnish
Instructions
- In a bowl, mix graham cracker crumbs, melted butter, and sugar until combined.
- Press mixture firmly into the bottoms of lined muffin cups. Chill for 10 minutes.
- In a separate bowl, beat cream cheese and sugar until smooth and creamy.
- Mix in sour cream, key lime juice, lime zest, and vanilla until fully combined.
- Gently fold in whipped cream until light and fluffy.
- Spoon cheesecake filling over the crusts and smooth the tops.
- Chill for at least 3 hours or until set.
- Top with whipped cream and garnish with lime slices before serving.
Notes
- Use fresh lime juice for the best flavor.
- Chilling the crust before adding the filling helps it hold together.
- For a firmer texture, chill cheesecakes overnight.
- Prep Time: 20 minutes
- Cook Time: 0 minutes
- Category: Dessert
- Method: No Bake
- Cuisine: American
Nutrition
- Serving Size: 1 mini cheesecake
- Calories: 290
- Sugar: 20g
- Sodium: 220mg
- Fat: 18g
- Saturated Fat: 10g
- Unsaturated Fat: 6g
- Trans Fat: 0g
- Carbohydrates: 28g
- Fiber: 1g
- Protein: 4g
- Cholesterol: 50mg
Keywords: Mini key lime cheesecakes, No bake cheesecake, Mini cheesecake dessert, Lime cheesecake recipe, Summer cheesecake, Individual desserts